Set up your Cerner FHIR Sandbox
Oracle offers a testing secure-sandbox (read-only) to interact and develop against their FHIR Server. If you want to try out the Cerner FHIR Adapter in IguanaX, you will first need to login or signup for an Oracle Health code Console account.
Go to https://code-console.cerner.com/ and sign-up for an account
Go to Oracle Health code Console and login or sign up.
Create a new application

Input the application details, and choose the application type to be System and Smart Version to be Smart V1. Select your intended users and intended purposes. You can leave the optional fields empty. Next select the product family and products as follows:
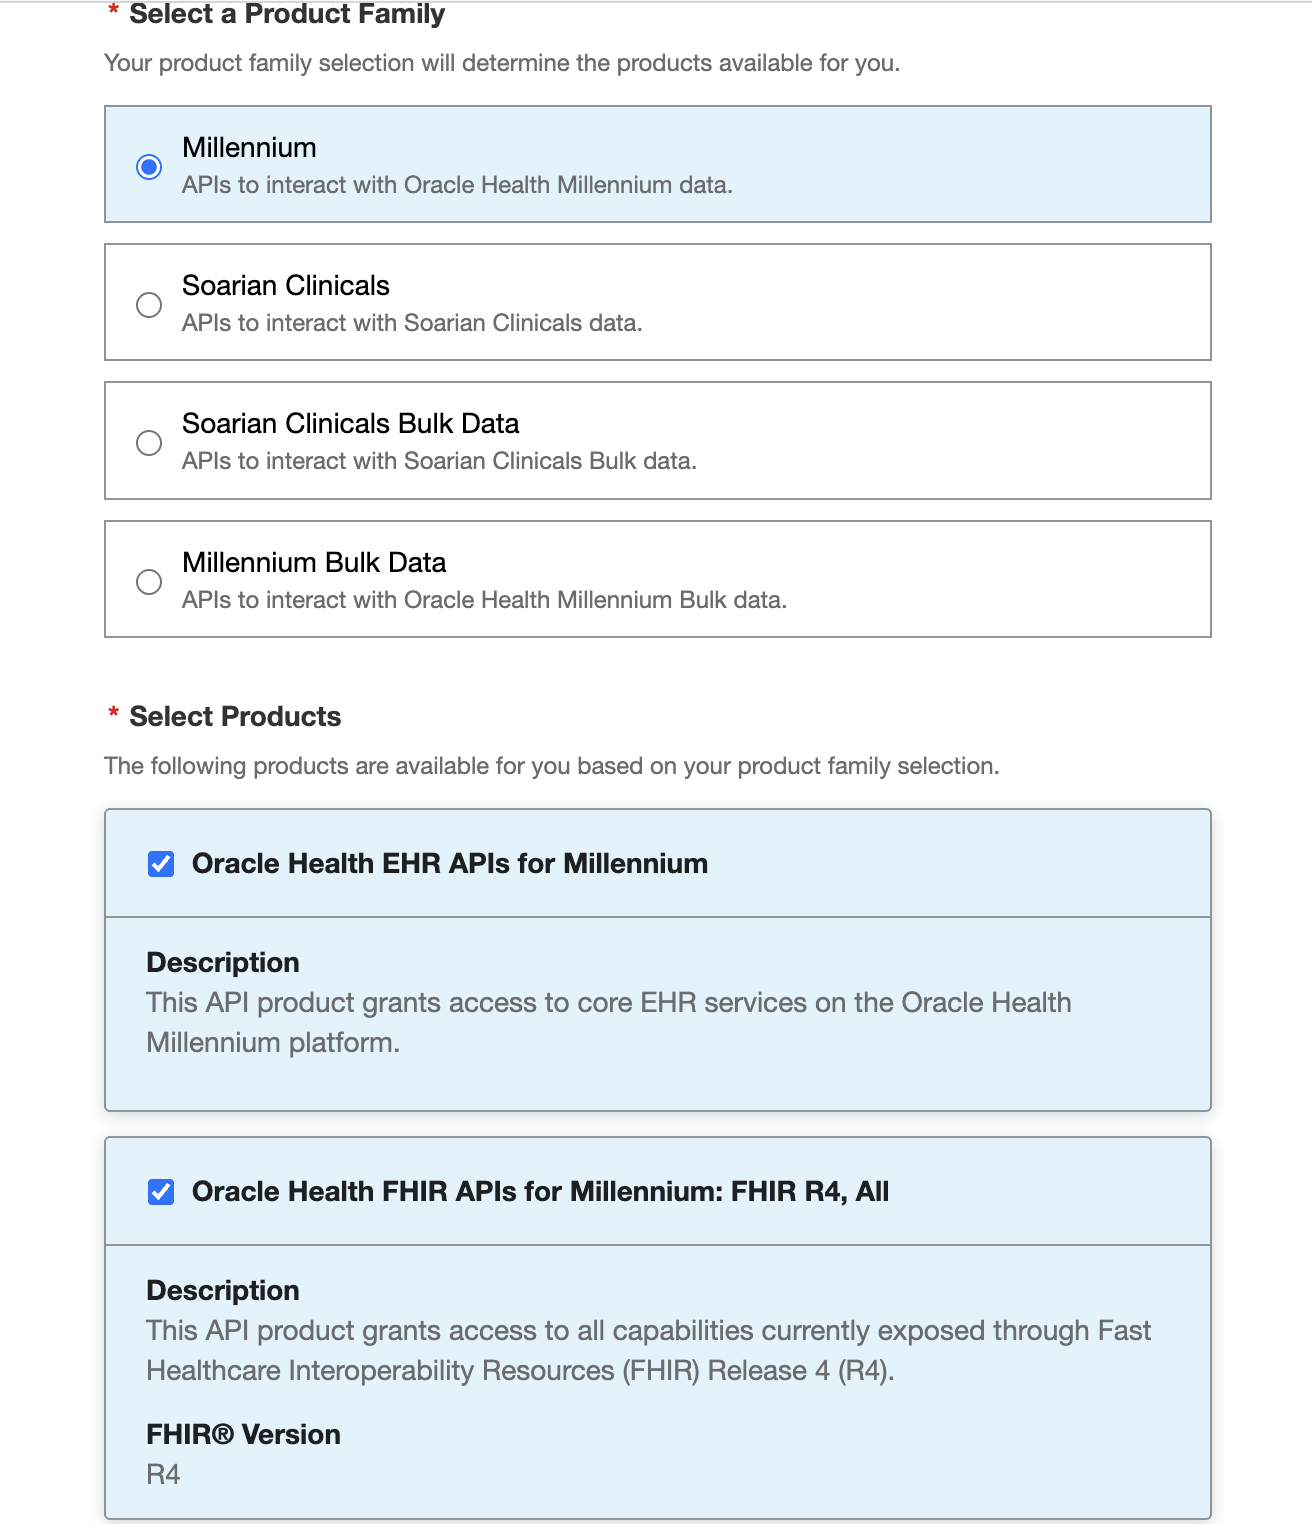
The core one that we care about is Oracle Health FHIR APIs for Millennium: FHIR R4, All
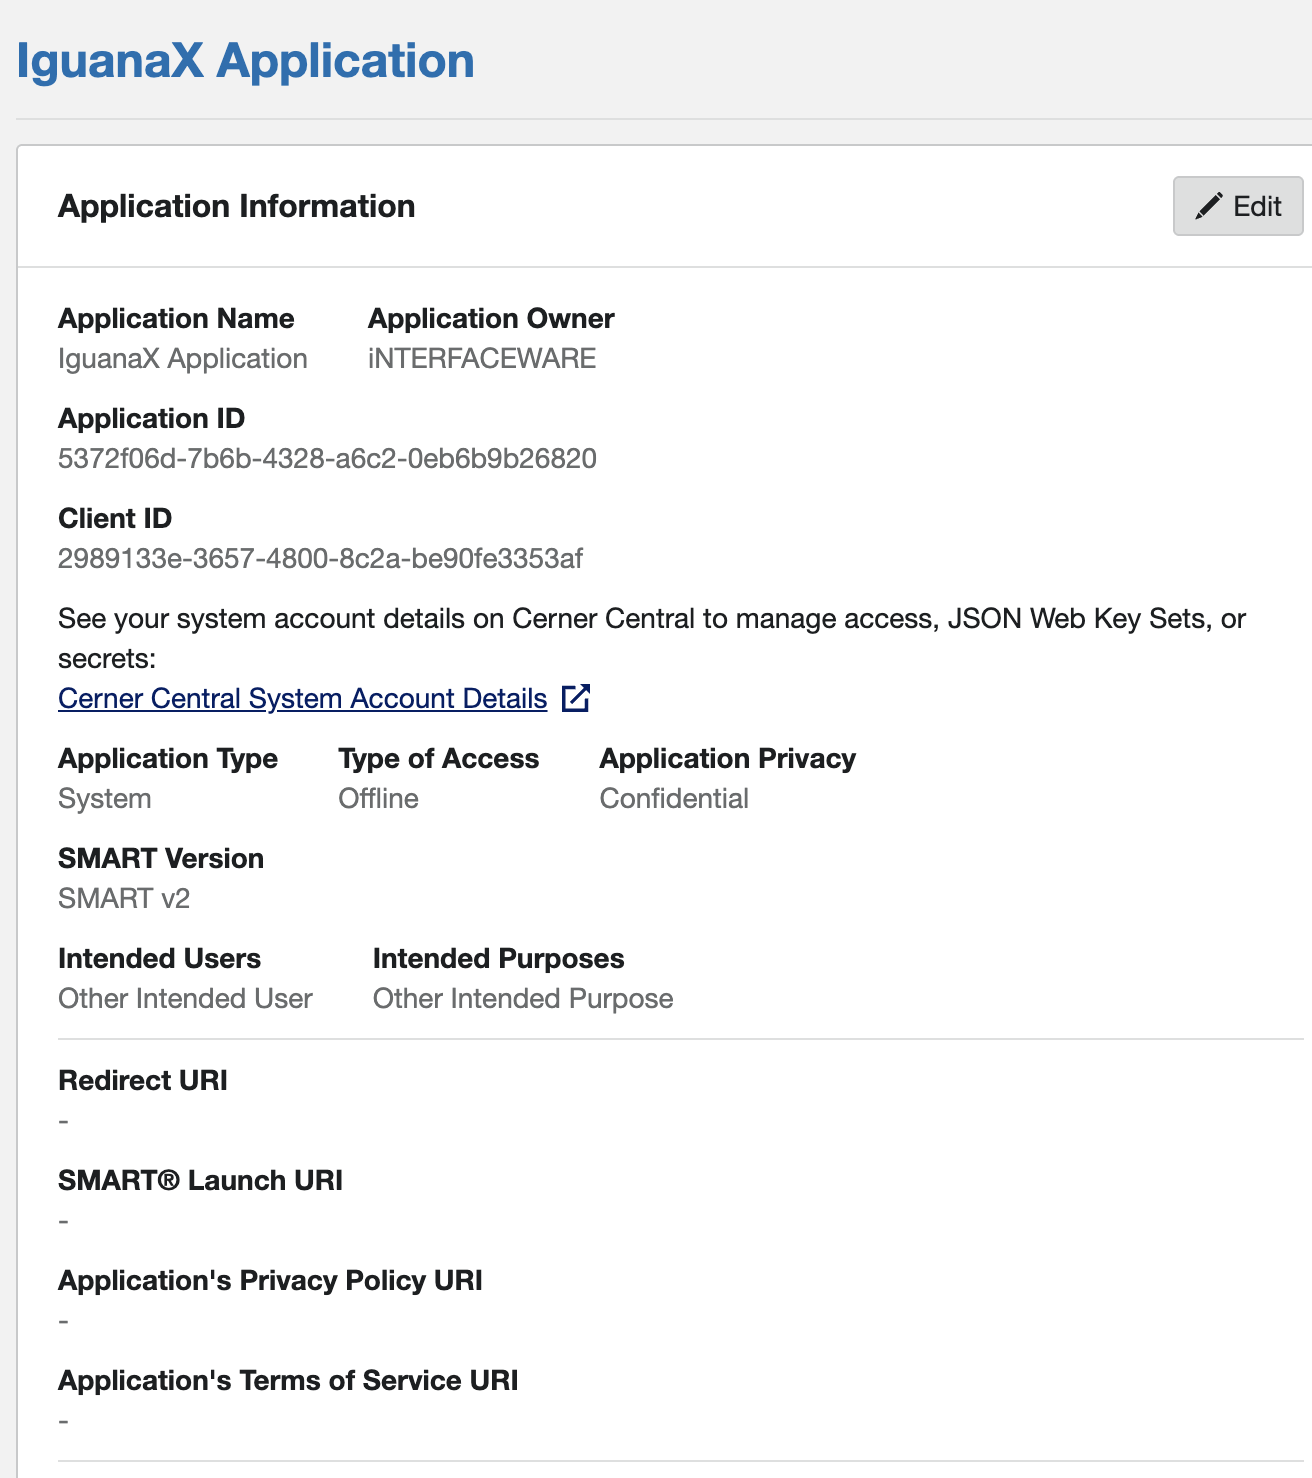
Next select access level for the application as needed and register the application. You will notice that you now have access to the Client ID which you will need later on. You can find the Base URL using the documentation which you can find here.
As of writing this, the Base URL for the Secure Sandbox is:
https://fhir-ehr-code.cerner.com/r4/ec2458f2-1e24-41c8-b71b-0e701af7583d/
Setup the authentication process
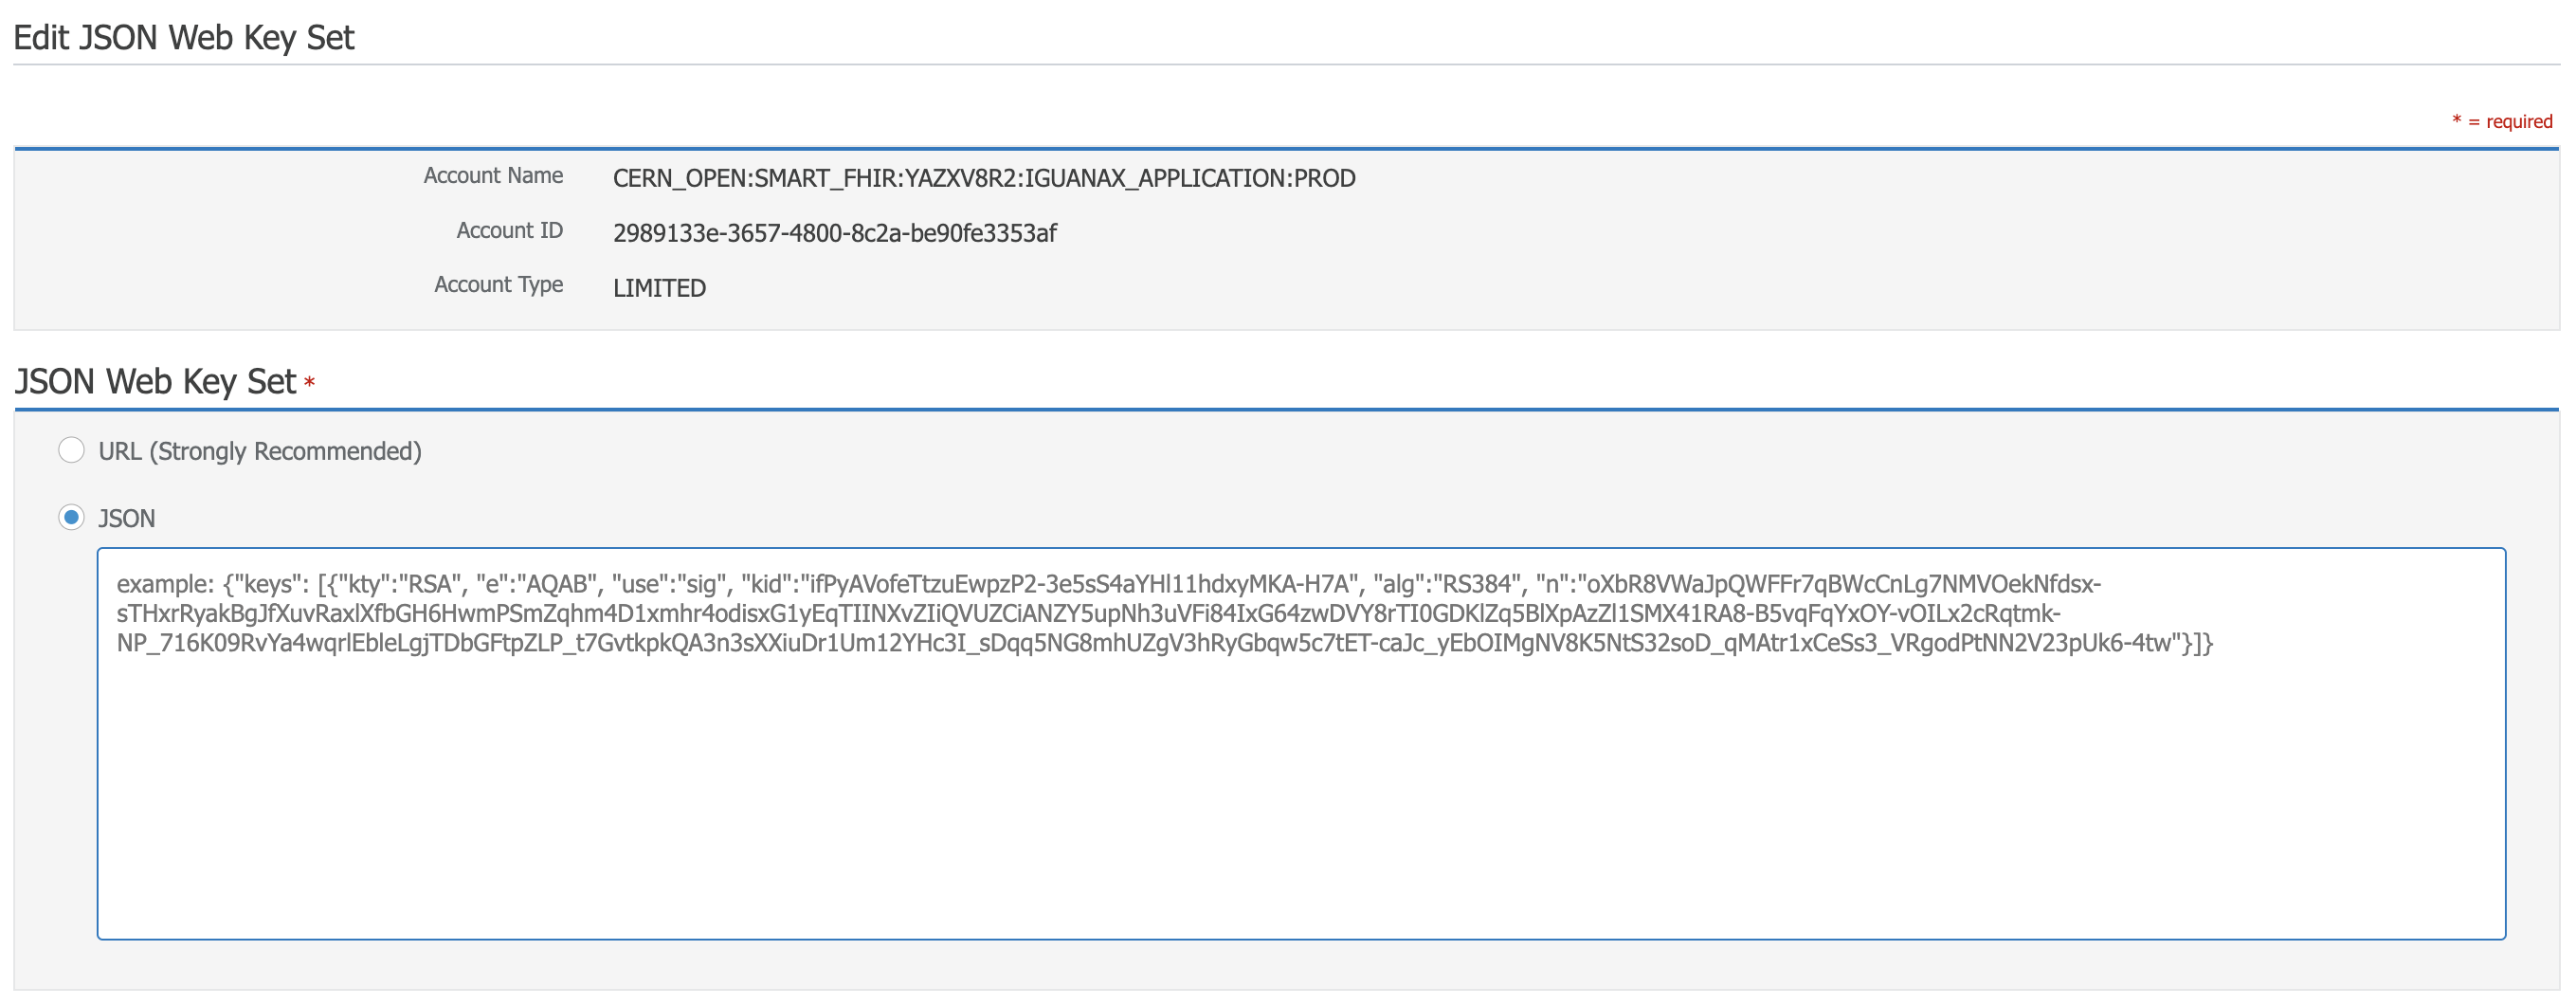
You will need to go to your System Account (Note that it will be a limited type account). You can use the link provided.
Under JSON Web Key Set, click on edit, then add in your JWKS.

To create your JWKS, we found that using an AI Chatbot (e.g., ChatGPT) and providing it with the example below can speed up the process quite significantly as it can provide all of the necessary commands to generate a key pair and the JWKS.
Also note down the “kid” here as it is the Key ID that will be used in the Adapter. As well the private key path as it will be used to authenticate with the endpoint.
Once that is done, you should be good to go to start testing with the Cerner FHIR Adapter.