Understanding Databases in Iguana
In addition to allowing you to work with databases like Oracle, SQL Server, MySQL etc.
IguanaX comes with built in support for the SQLite database format which is a good choice for learning before you use your preferred database.
This can be very helpful for simple requirements when you are operating Iguana in an environment which does not make it easy to operate other databases.
Note: It is recommended that column names do not contain spaces (ex. First Name). If column names have spaces, db.merge will not be able to be used and instead will have to write and execute SQL statements from the Translator.
If you want to use merge with spaces in column names you can use the custom merge module (you will need to modify it to use the correct column name delimiters for your target DB) https://help.interfaceware.com/v6/customize-custom_merge-lua-for-table-and-field-names-with-spaces
Here are steps to use the SQLite database in IguanaX GUI:
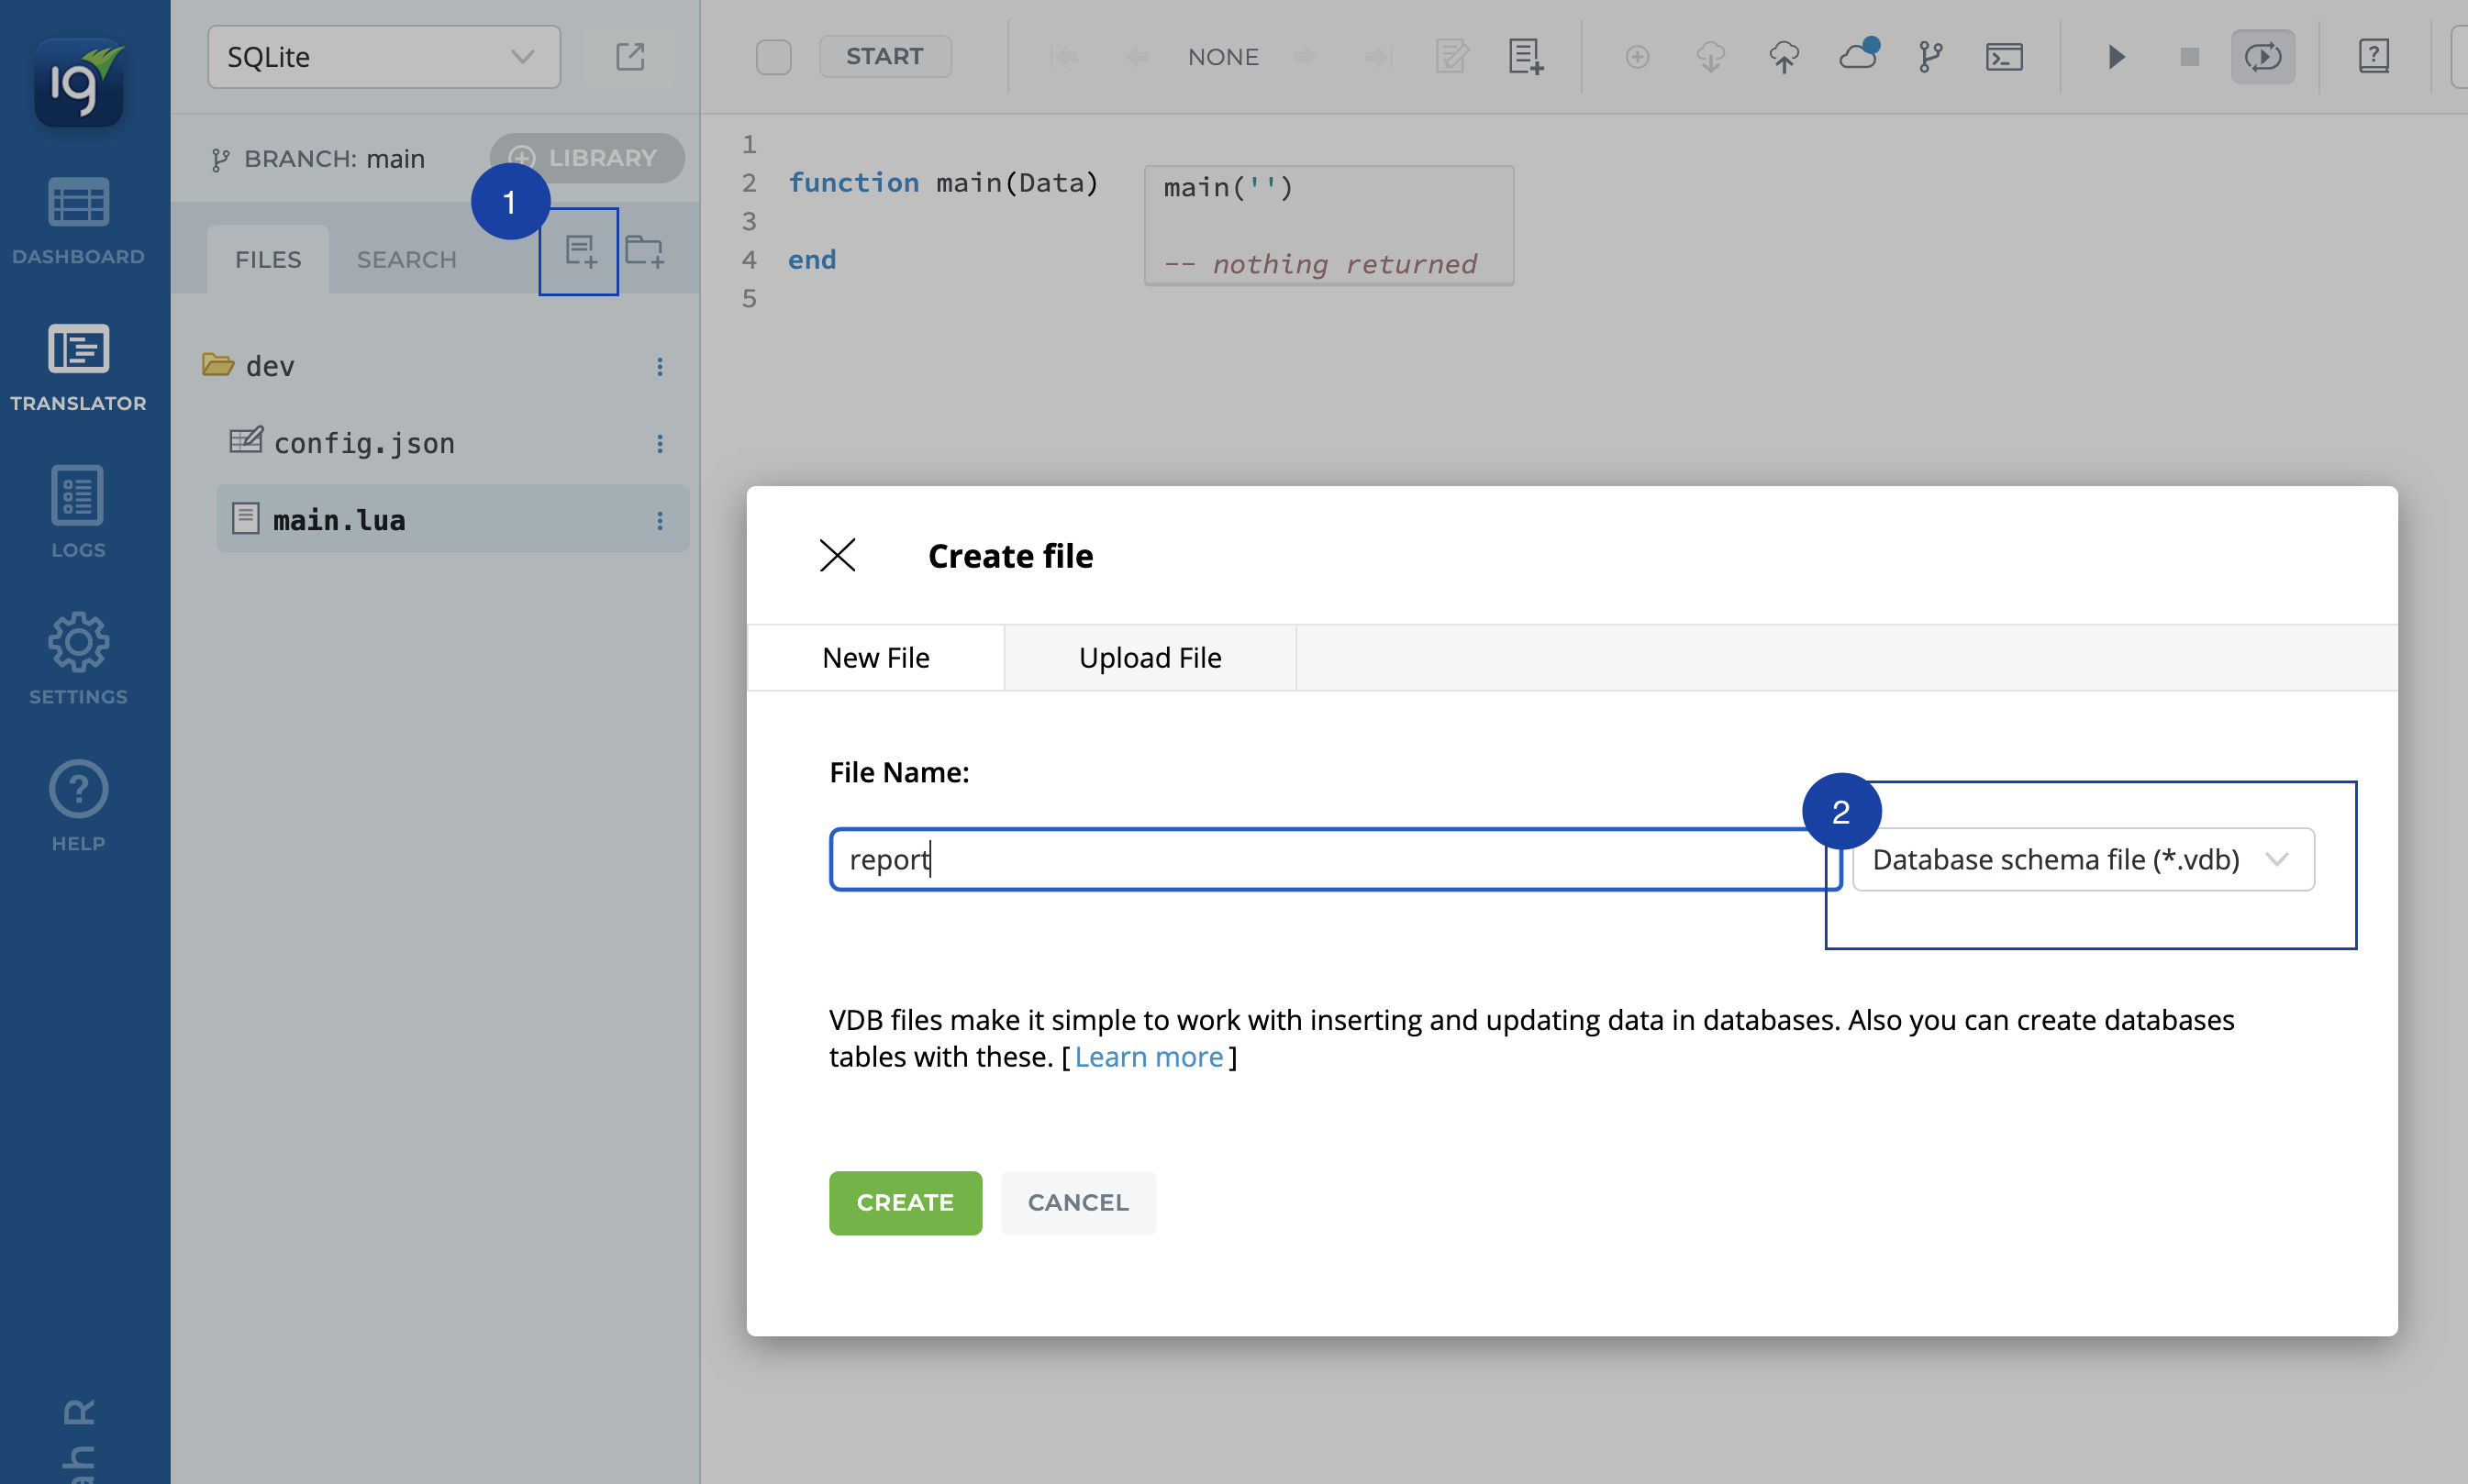
STEP 1: Add a report.vdb file to your project.
-
Click Add File
-
Choose a Database Schema File (*.vdb) and name it report
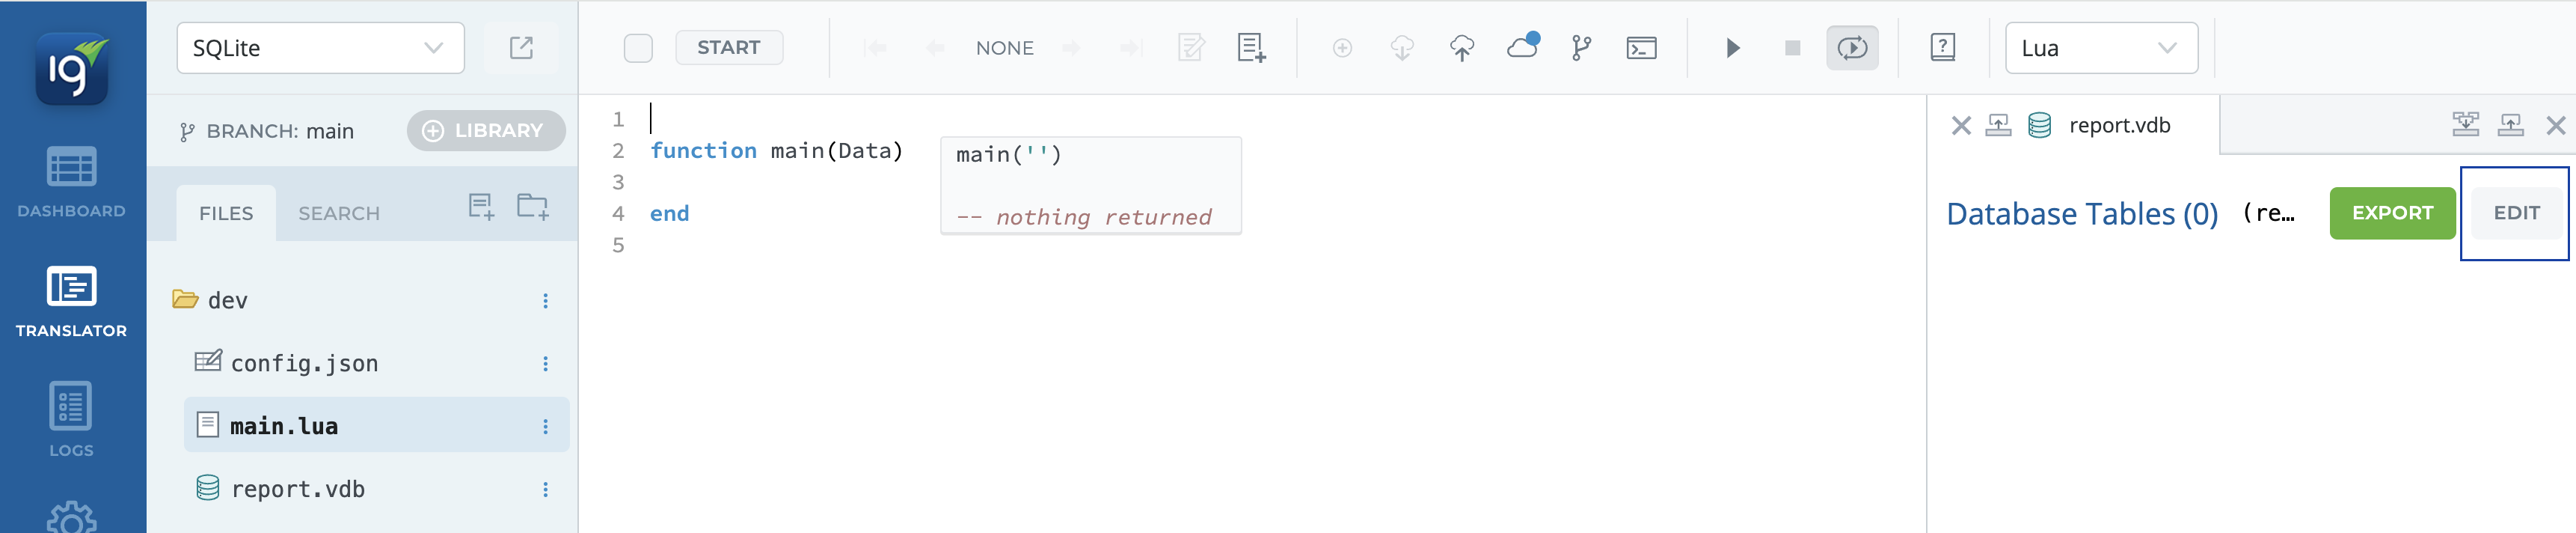
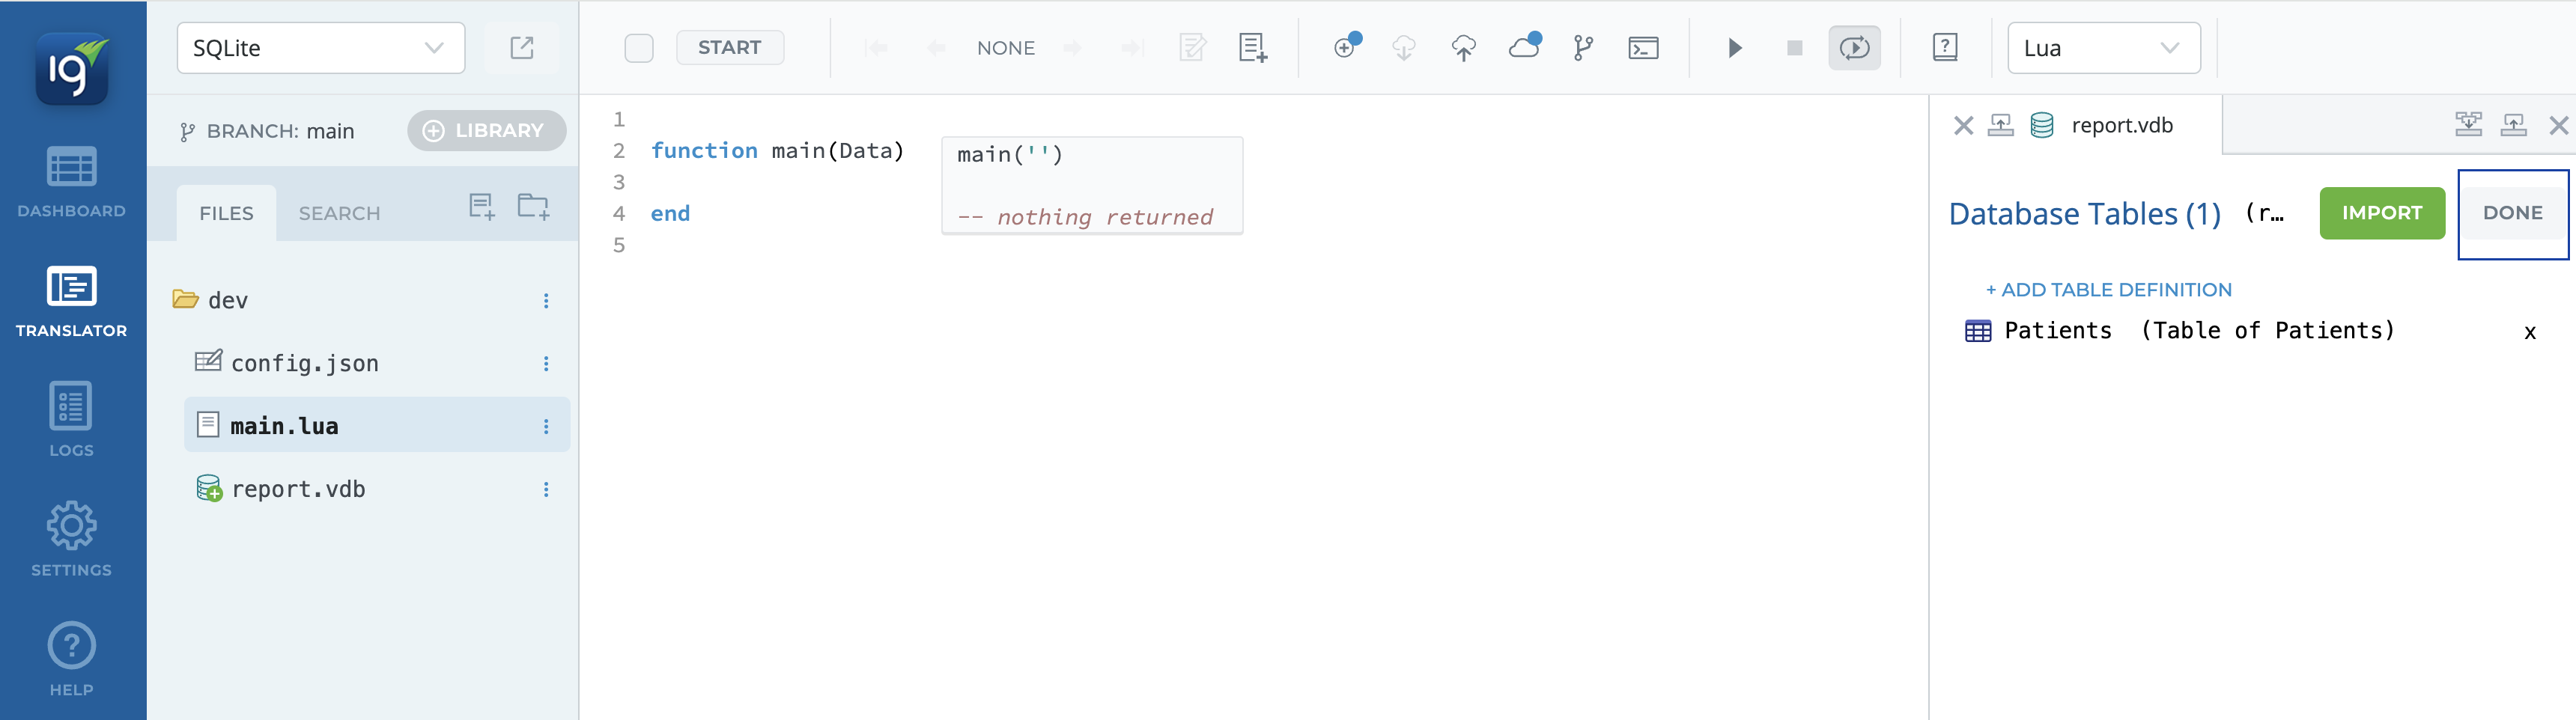
STEP 2: Edit the VDB file to add a table definition with parameters
-
Edit the VDB with the built in GUI:
-
Add the Table Definition:
-
Click + TABLE DEFINITION
-
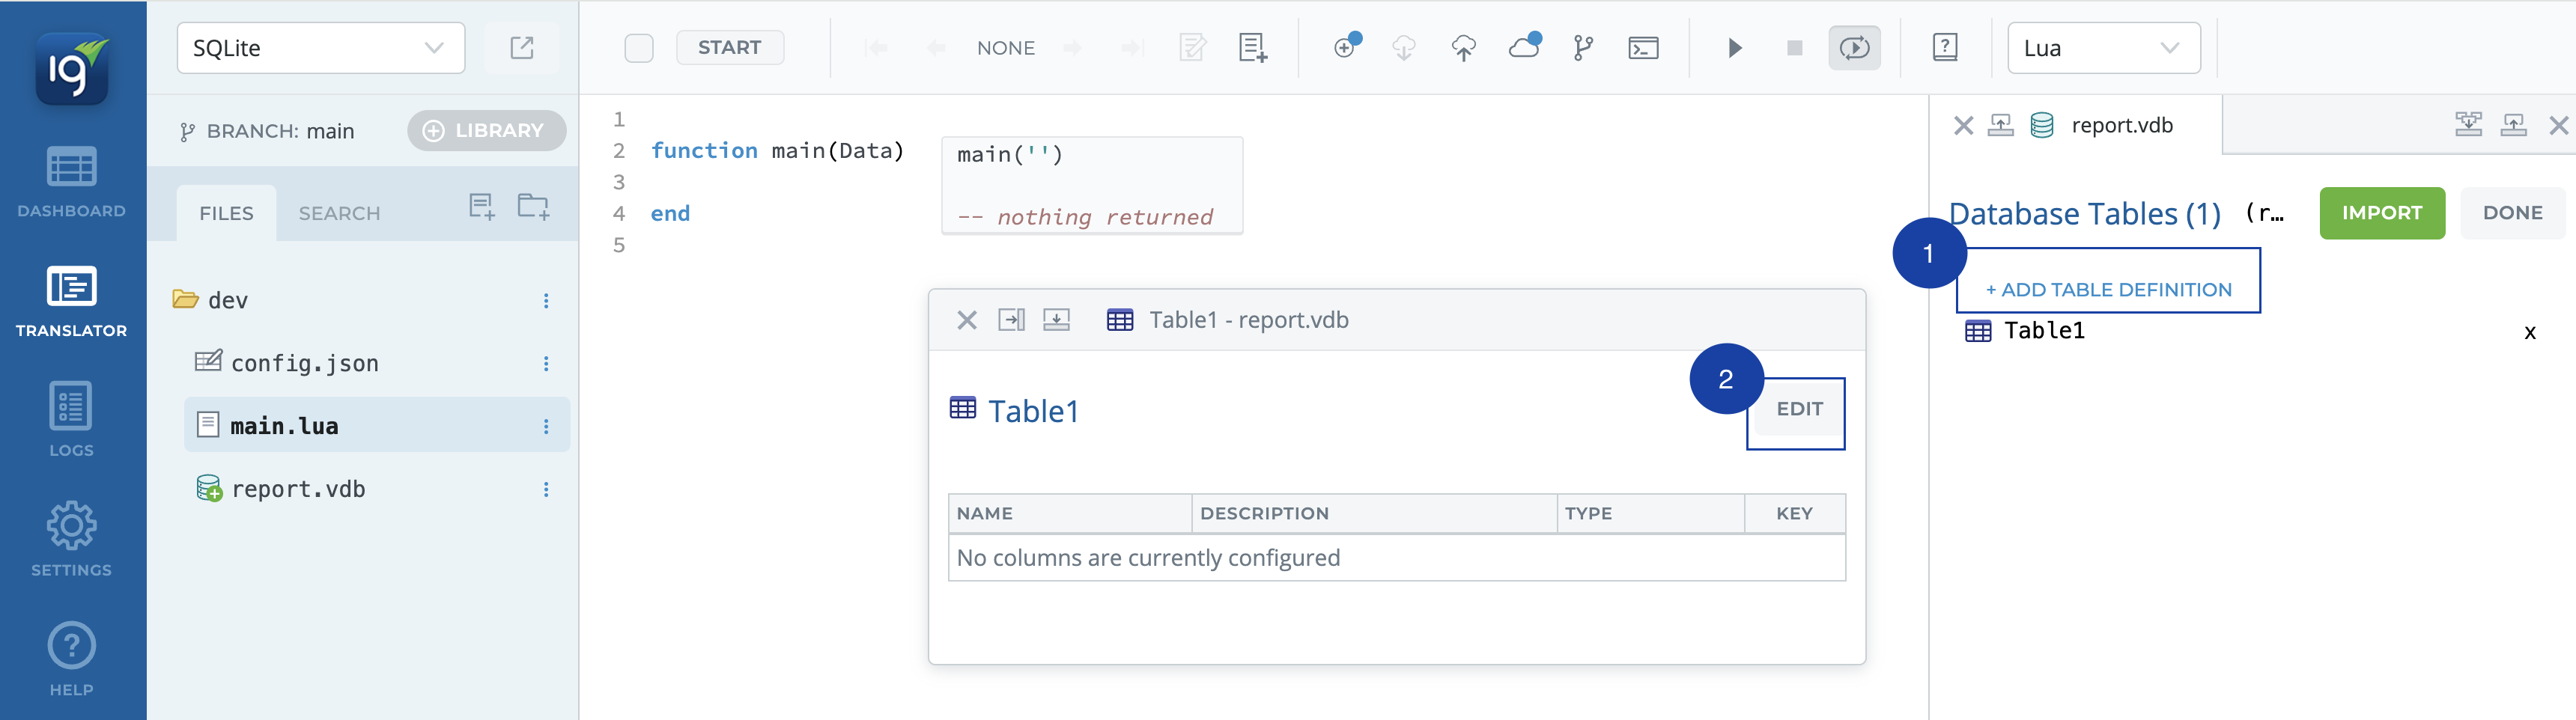
Click Edit the table
-
-
Edit the table to look like below and Save:
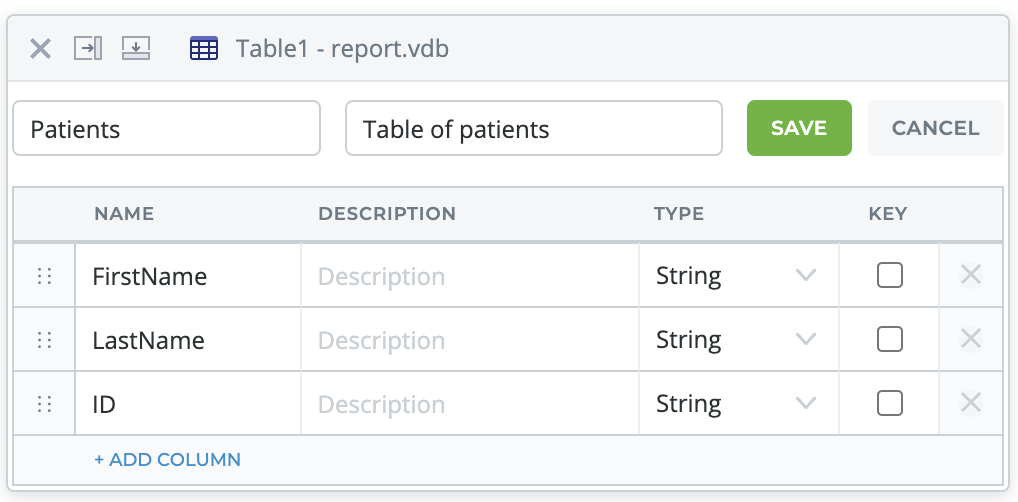
If you noticed we did not use the Key field on the right side of the new parameters. If you would like to learn more about using the Key fields and the importance of them please have a read of this page: Key Fields and Examples
Spaces in column names (ex. First Name) is not recommended. If column names contain spaces, db.merge can not be used and SQL statements will need to be written and executed instead.
4. Click Done and then click Export:
5. Use the SQLite API and add the name ‘patients.db' to the File. Click Execute:
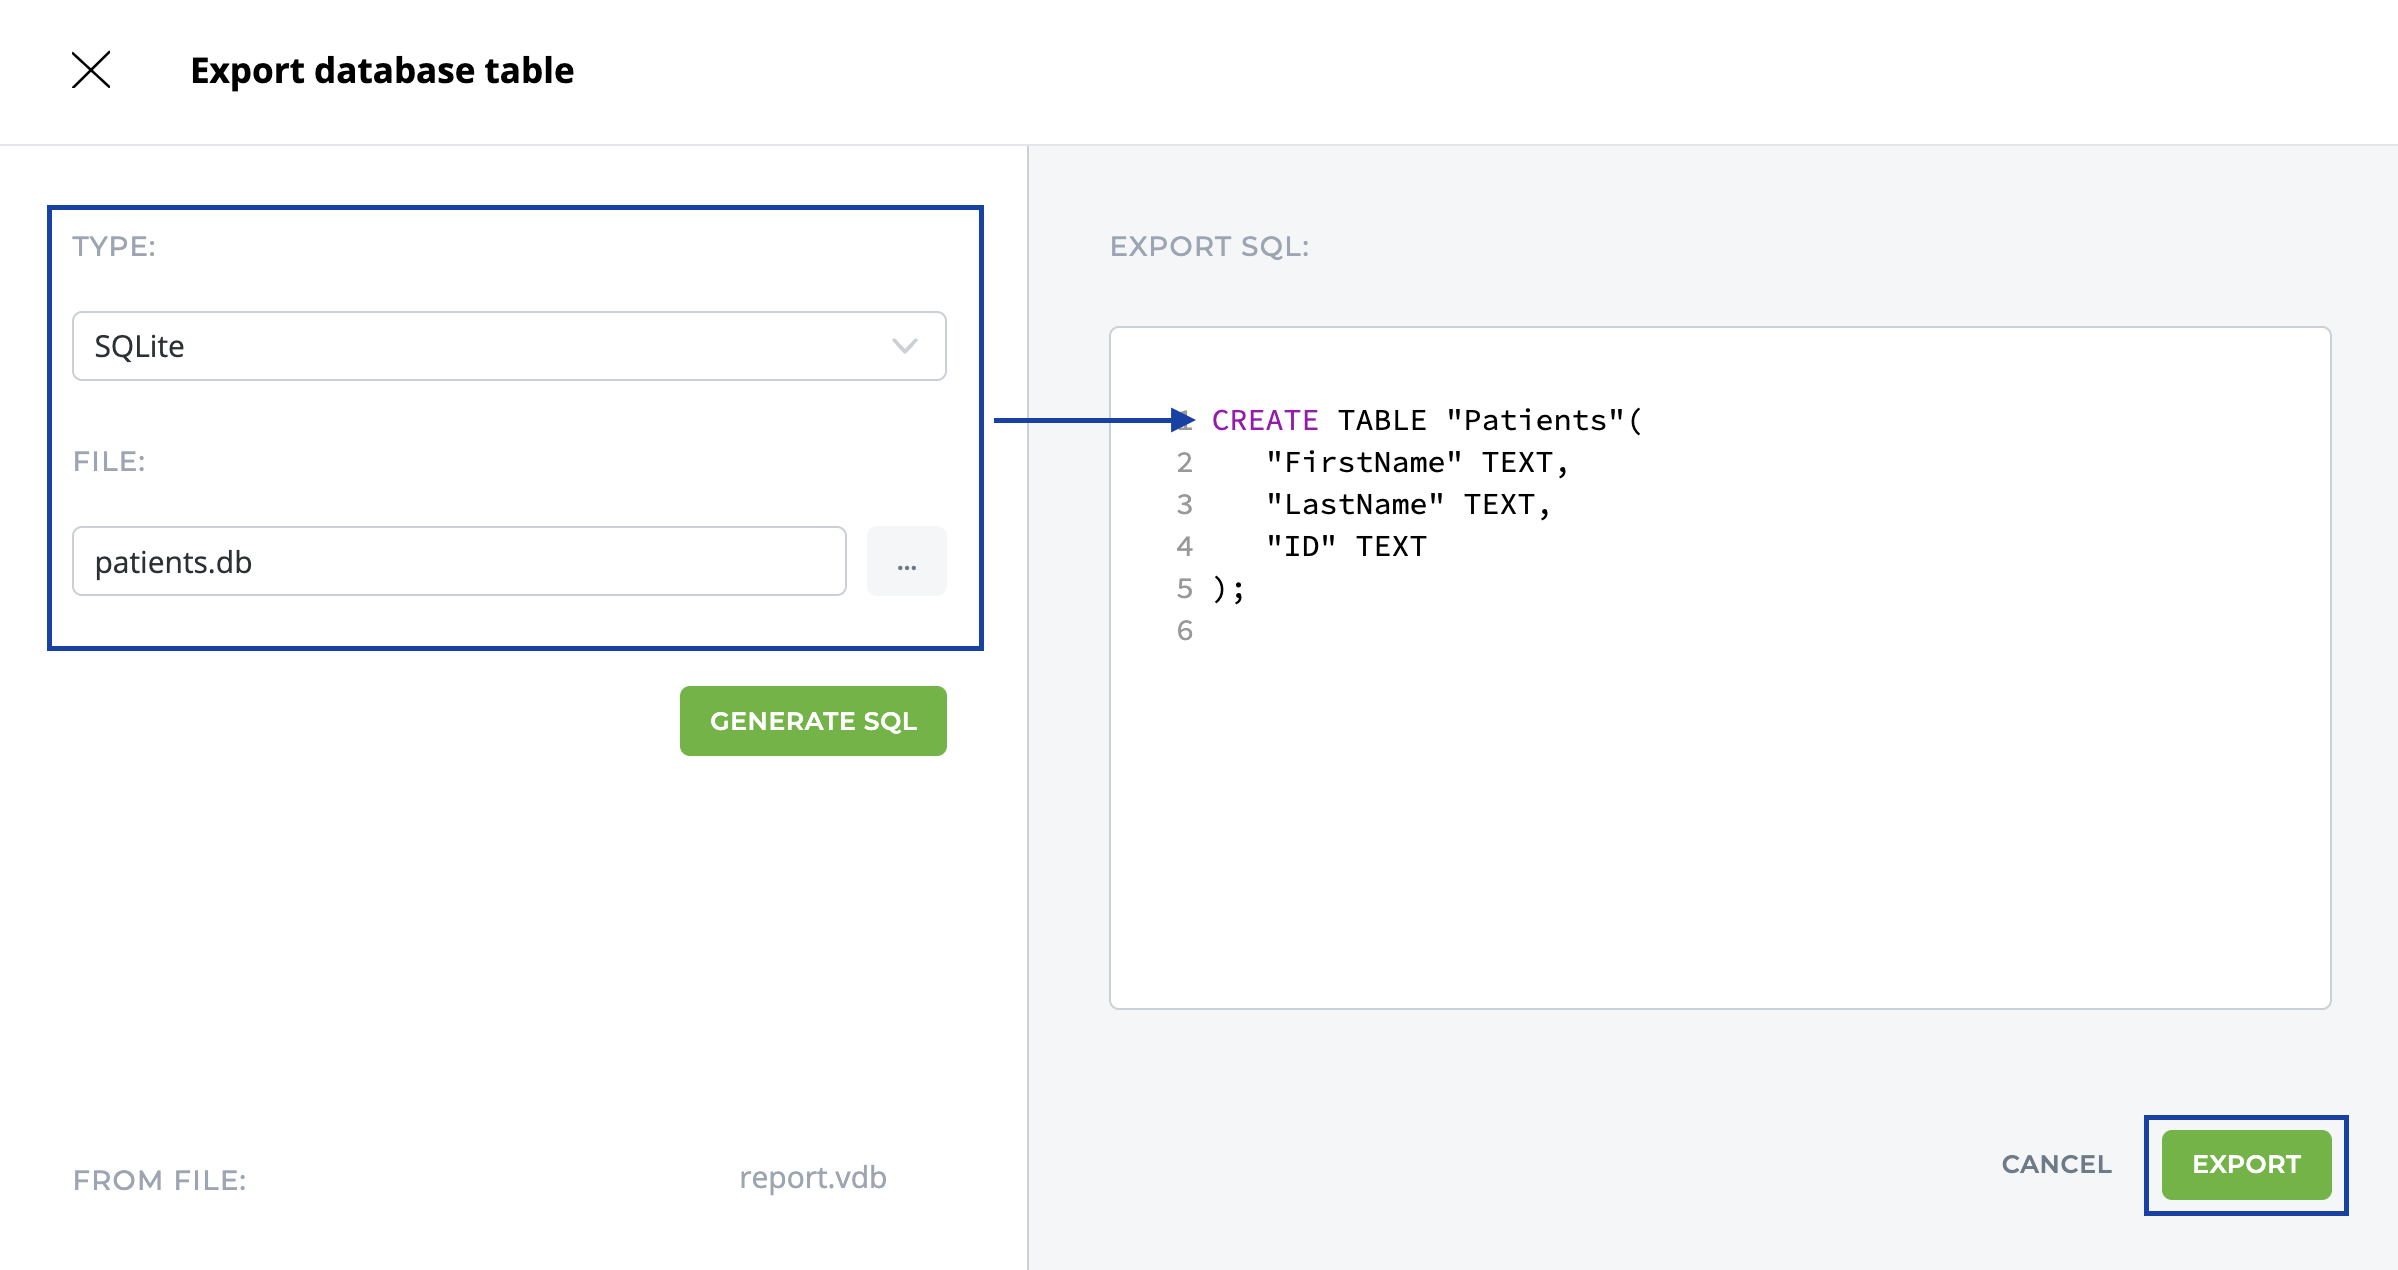
This will create the patients.db file in the Iguana working directory.
STEP 3: Copy the pre-built code and paste in your translator.
local D = db.connect{api=db.SQLITE, name='patients.db'}
local R = D:query{sql='SELECT * FROM Patients LIMIT 50;'}
This will only display an empty table, to populate the table continue the next steps.
STEP 4: Add data to your Patients.
Populate your table with some hardcoded values, try doing it yourself!
-
After connecting to the database with
db.connect, use your VDB table to map new values by callingdb.tables. -
Once you've mapped your FirsName, LastName, and ID, use
db.mergeor the shorthandconn:mergeto merge your VDB table with your database table. -
Then you can query the table to see your data.
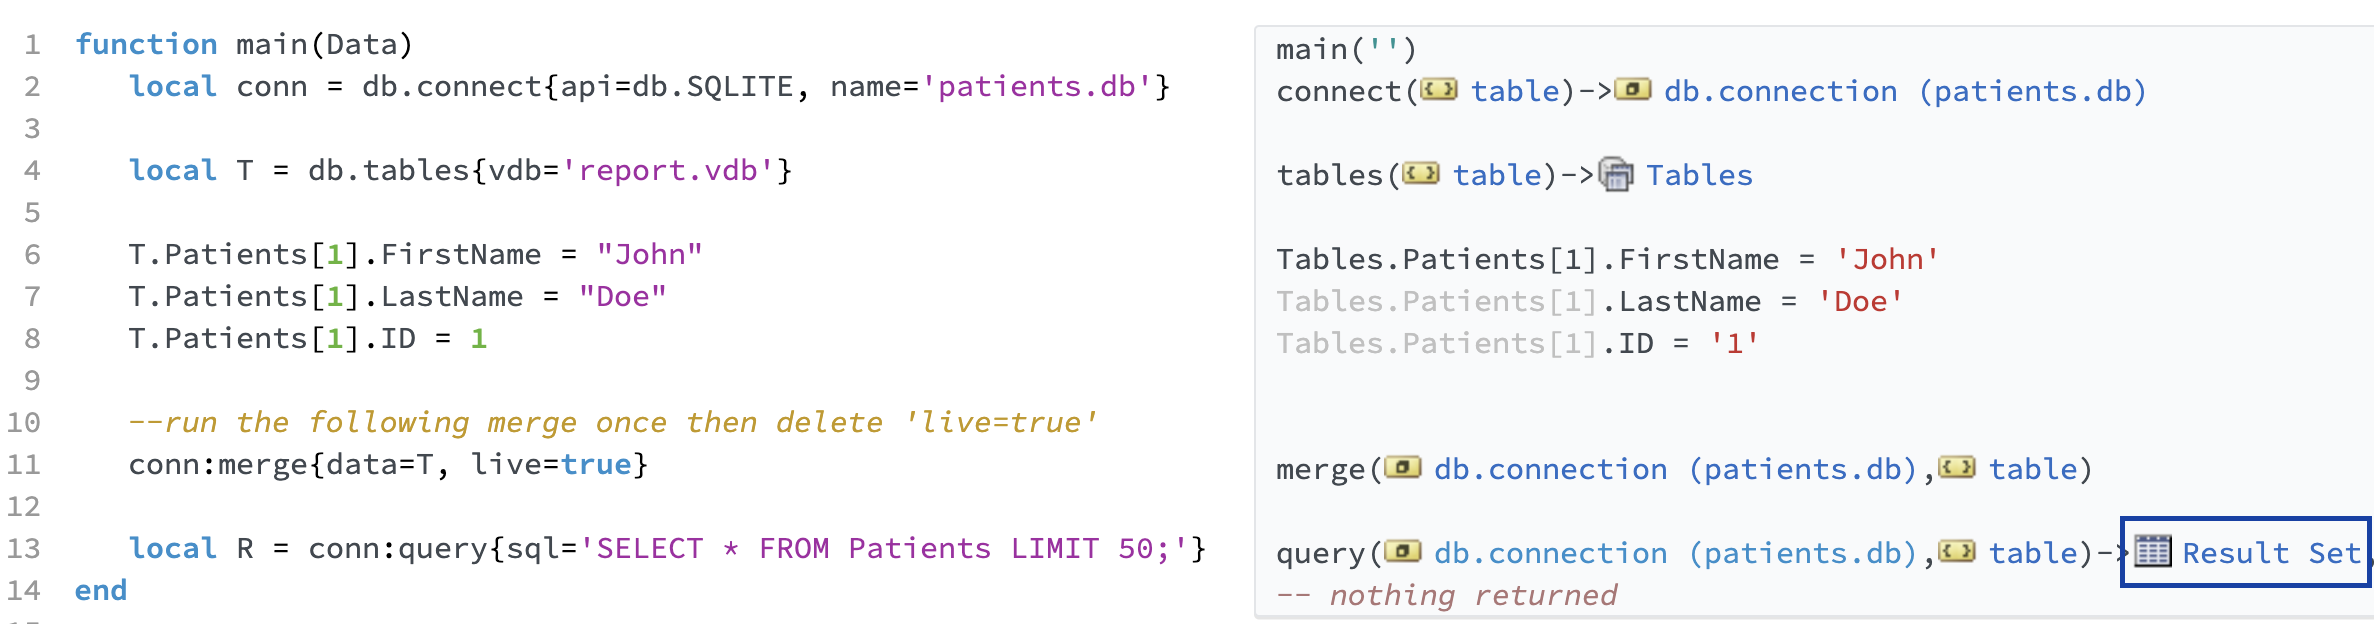
Here is what your main function should look like to add to your Patients:
function main(Data)
   local conn = db.connect{api=db.SQLITE, name='patients.db'}

   local T = db.tables{vdb='report.vdb'}

   T.Patients[1].FirstName = "John"
   T.Patients[1].LastName = "Doe"
   T.Patients[1].ID = 1

   --run the following merge once then delete 'live=true'
   conn:merge{data=T, live=true}

   local R = conn:query{sql='SELECT * FROM Patients LIMIT 50;'}
end
STEP 5: View the queried data.
Use the Annotation Windows to view your results.
The Result Set should look something like this, depending on how many times the translator has ran:

This is part of your product Getting Started