Oracle OCI Driver Setup
This procedure installs the the Oracle OCI drivers globally, which means that the drivers will be available for all users on the machine.
We recommend installing the Oracle OCI drivers (and other database drivers) in the correct/default global driver directories for your operating system. However it is possible to install drivers locally (for a single user) if you wish to restrict access.
Do not install Instant Client drivers if Oracle and/or the Instant Client drivers are already installed!
To check, use File Explorer to search for the tsnnames.ora file. If this file exists, speak to your DBA (database administrator) to identify the correct course of action.
How to set up the Oracle instant client OCI drivers:
Windows:
STEP 1: Install the latest Oracle OCI instant client drivers
-
Download the https://www.oracle.com/technetwork/topics/winx64soft-089540.html. Choose the latest version of the Base package, either Basic or Basic Light.
Iguana may not always support the very latest version of the ODBC drivers, so you can simply download an earlier version if necessary.
If you need to know which versions of Oracle OCI are supported by the version of Iguana you are using please contact us at support@interfaceware.com.
-
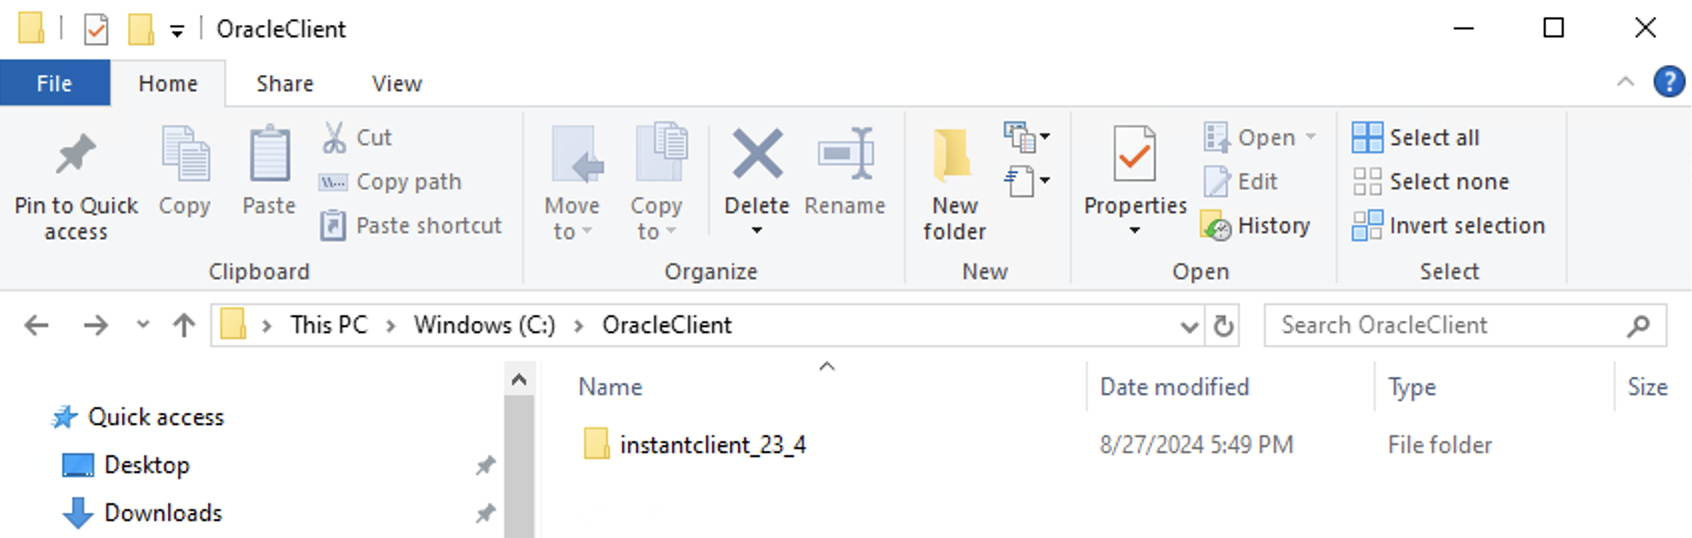
In File Explorer, create an installation directory - C:\OracleClient
-
Unzip and extract the downloaded drivers into the C:\OracleClient directory.
STEP 2: Add the OCI drivers directory to the windows Path system variable
Add the OCI drivers directory to the windows Path system variable so that Iguana can find the Oracle drivers automatically.
-
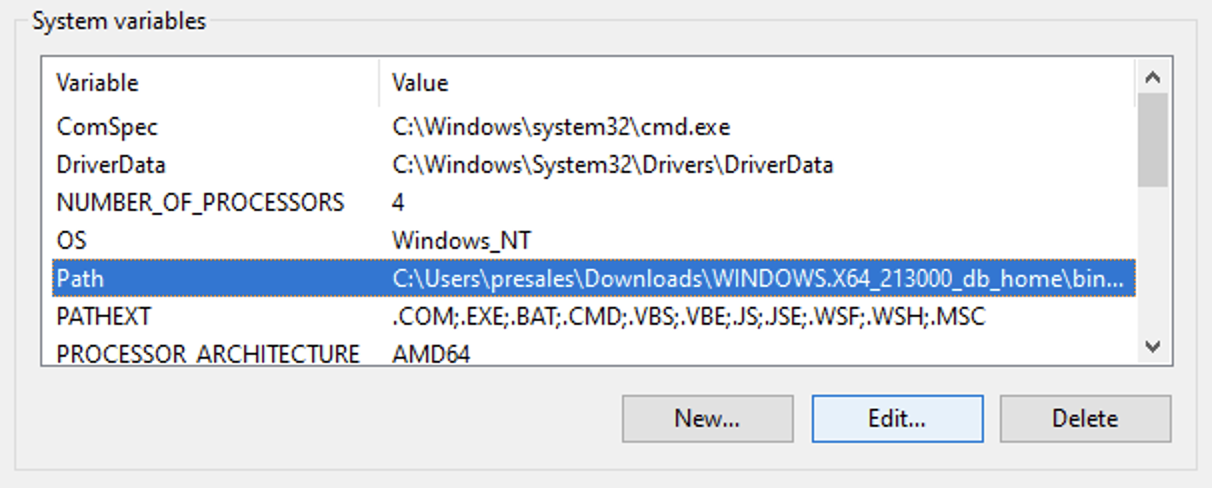
In Windows, search for “Environment” and choose Edit the system environment variables to open the System Properties window. Click the Environment Variables button near the bottom of the page:

-
Highlight the System Path variable and click Edit.
-
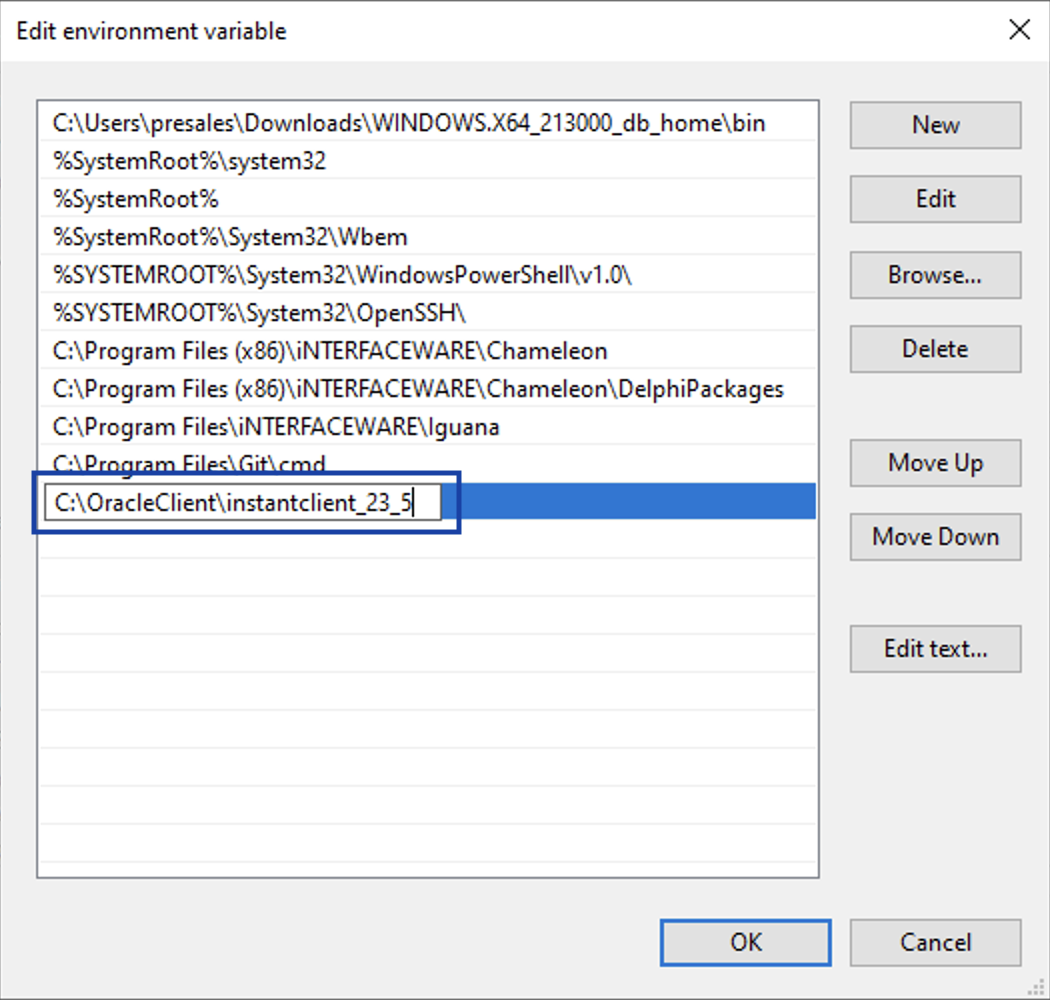
In the Edit environment variable window, add the location of your oci.dll file on the next line, and click OK to save your changes:
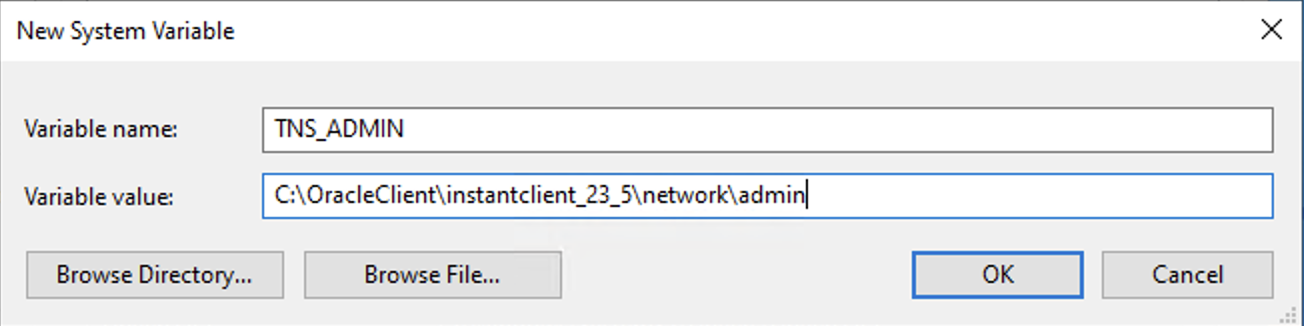
STEP 3: Create or ensure TNS_ADMIN variable points to the directory containing tnsnames.ora
In the System Variables, the TNS_ADMIN variable must point to the directory containing tnsnames.ora — typically <instantclient install>/network/admin.
-
If TNS_ADMIN does not exist then click New to create it, or click Edit if it already exists.
-
Enter the path to the directory containing tnsnames.ora — typically
<instantclient install>/network/admin, and click OK. If you are using an existing driver install then use the path that your DBA (database administrator) advises you to use.
-
Restart your computer so that the Environment Variables changes take effect.
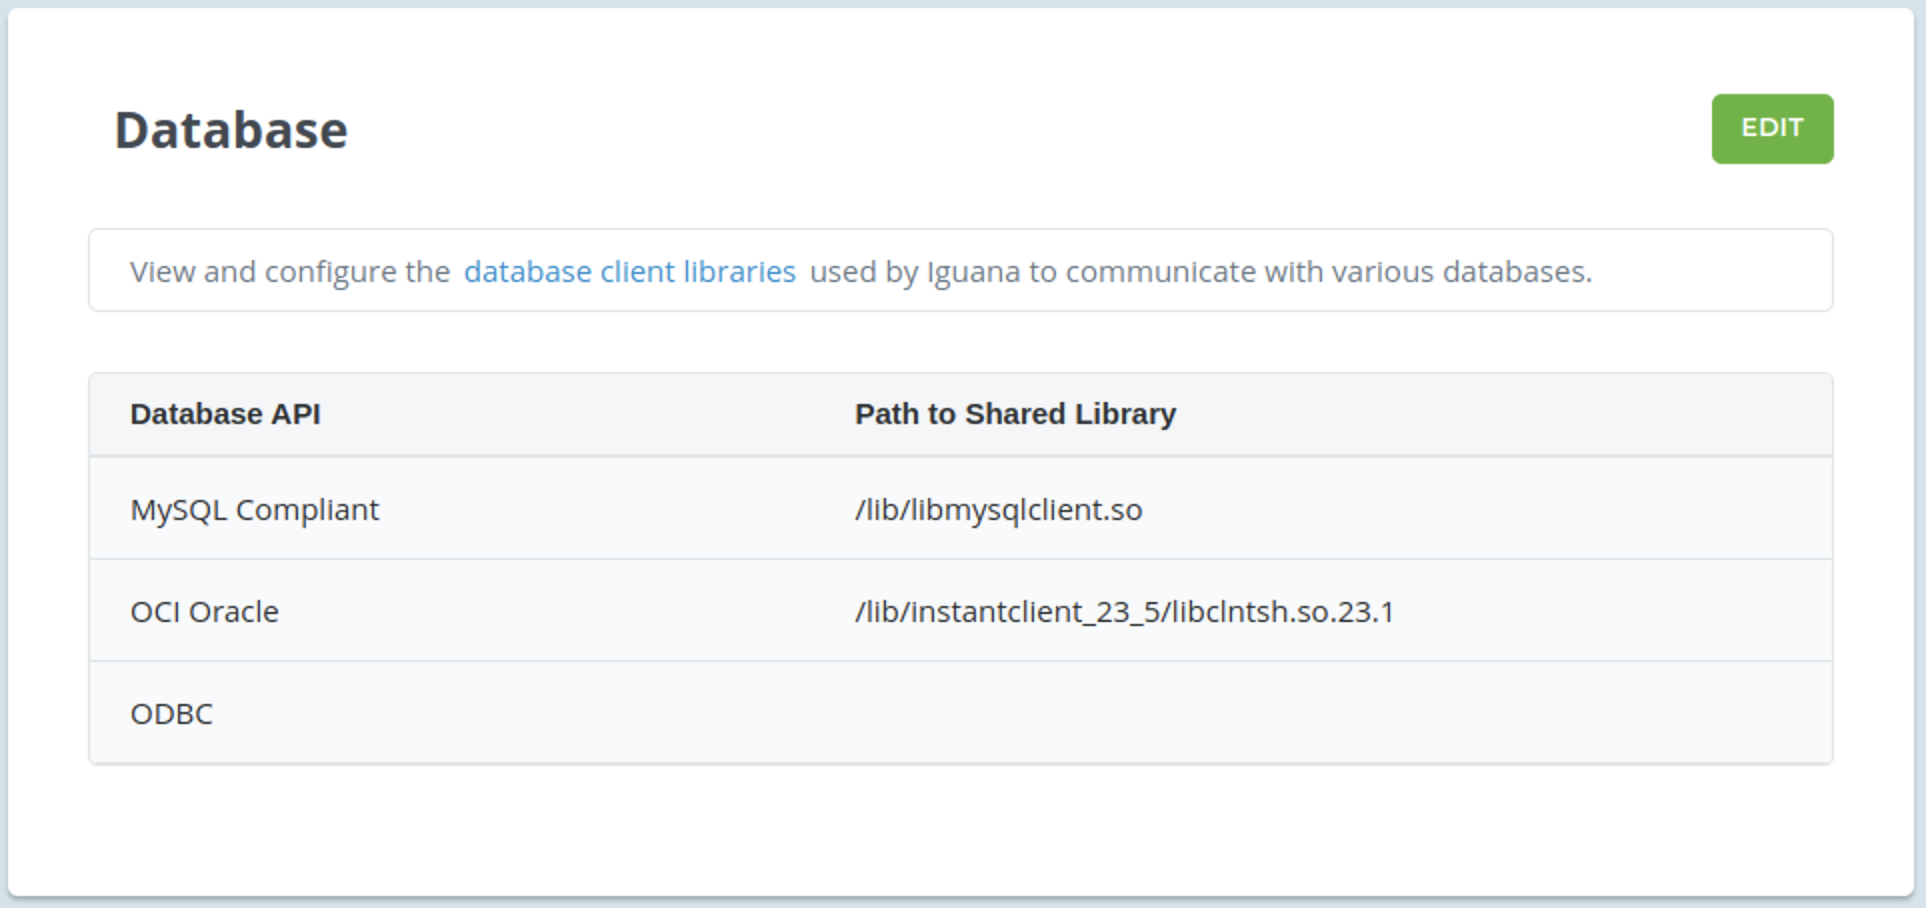
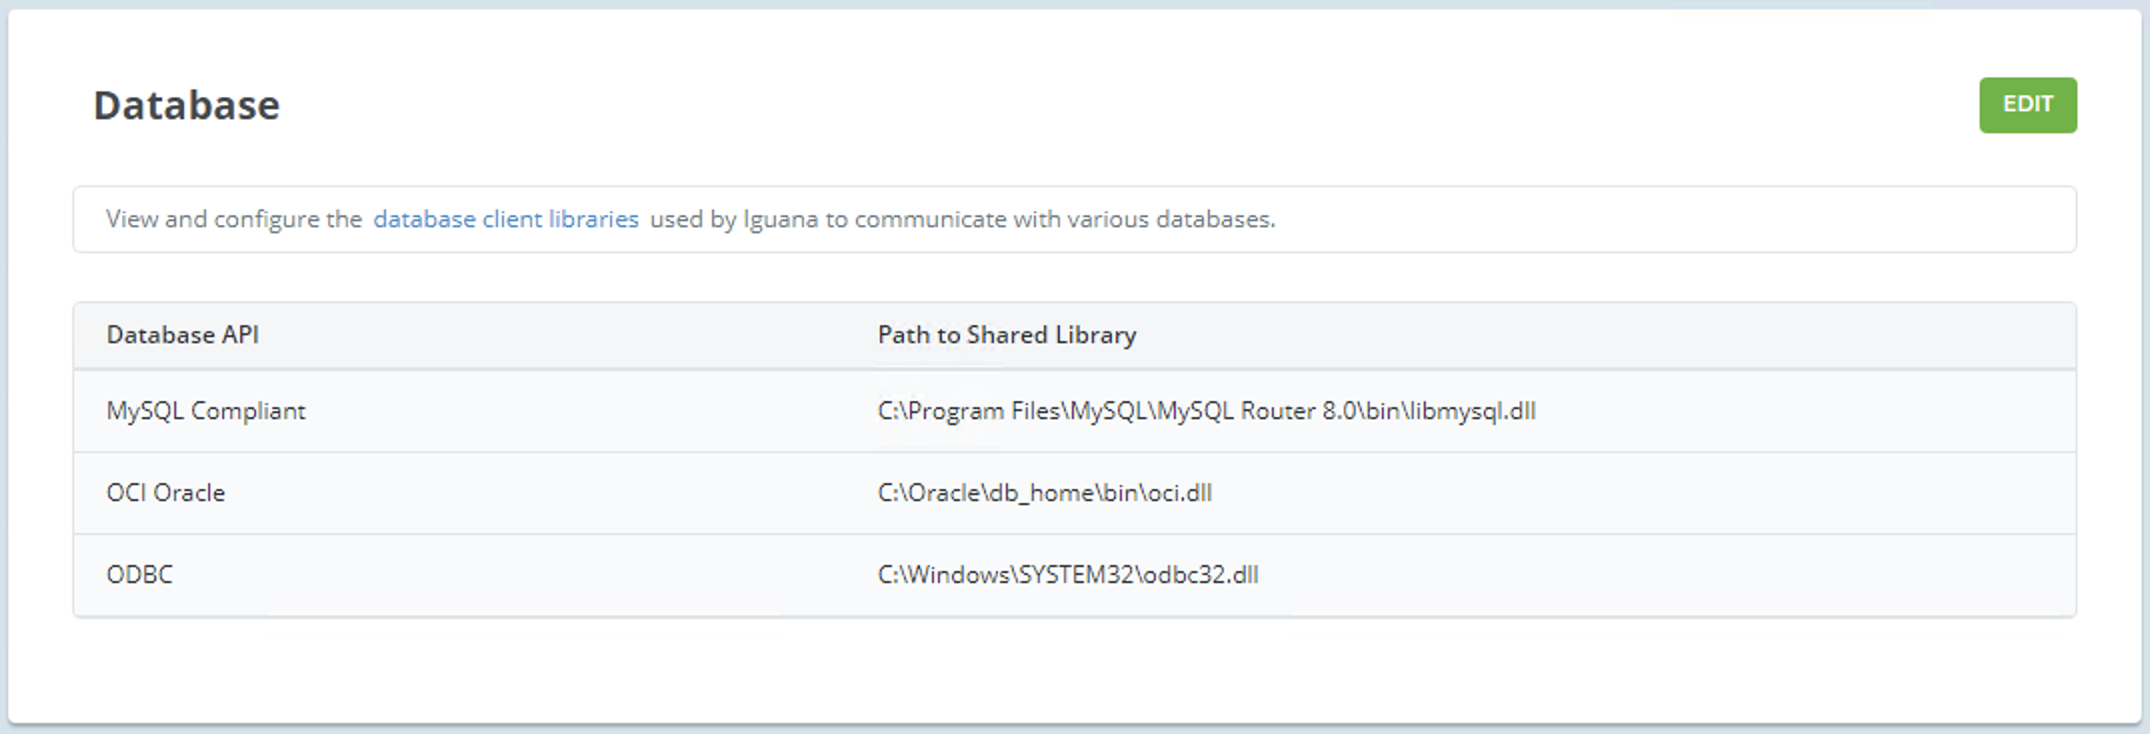
STEP 4: Confirm IguanaX has detected the Oracle OCI library in Settings > Database
In IguanaX, Settings > Database confirm the Oracle OCI library has been detected and loaded correctly.
If not, click Edit to manually add the Oracle OCI shared library path. If you don't know the location, you can search for the oci.dll
Linux:
STEP 1: Install the latest Oracle OCI instant client drivers
-
Download the https://www.oracle.com/technetwork/topics/linuxx86-64soft-092277.html. Choose the latest version of the Base package, either Basic or Basic Light.
Iguana may not always support the very latest version of drivers, so you can simply download an earlier version if necessary.
If you need to know which versions of Oracle OCI are supported by the version of Iguana you are using please contact us at support@interfaceware.com.
-
Unzip the package in the /usr/lib directory:
-
Note: change <version> to match your downloaded version
cd /usr/lib
sudo unzip ~/Downloads/instantclient-basic-linux.x64-\<version>.zip
-
-
Confirm that the /usr/lib/instantclient_X_Y was created:
ls -d in*

-
Check the contents of the instant client directory:
ls instantclient*

-
Create a symbolic link in the /usr/lib directory:
-
Note: replace “<_X_Y>” with the version numbers to match the directory name for the downloaded version. If you are upgrading to a new version of OCI you will need to delete the old symbolic link and recreate it to point to the new version of OCI.
sudo ln -s /usr/lib/instantclient\<_X_Y>/libclntsh.so /usr/lib/
-
-
Confirm that the symbolic link was created:
ls -l libclntsh.so

STEP 2: Update the runtime link path for dynamic libraries
This tells the instantclient software where to look for dynamic library dependencies.
Only do this if the instantclient is the only Oracle software you are installing! Do not do this if you are installing the Oracle database server on the same machine, instead discuss it with your DBA.
Update the instant client configuration file:
sudo sh -c "echo /opt/oracle/instantclient_X_Y > \ /etc/ld.so.conf.d/oracle-instantclient.conf"
sudo ldconfig
STEP 3: Install the libaio (or libaio1) package
You will need to use different (package installer) commands depending on the version of Linux you are using. For Ubuntu (Debian based) use apt, for CentOS (RHEL based) use yum.
Ubuntu or other Debian based Linux:
-
Get the latest package info:
sudo apt update
-
Install libaio/libaio1:
sudo apt install libaio1
CentOS or other Red Hat based Linux:
-
Get the latest package info:
yum check-update
-
Install libaio/libaio1:
sudo yum install libaio
-
Delete the zip package (or keep a copy if you prefer).
STEP 4: Confirm IguanaX has detected the Oracle OCI library in Settings > Database
In IguanaX, Settings > Database confirm the Oracle OCI library has been detected and loaded correctly.
If not, click Edit to manually add the Oracle OCI shared library path. If you don't know the location, you can search within your instantclient directory for the latest version.