Microsoft - SAML
Microsoft SAML authentication allows you to authenticate using a Microsoft SAML application. To configure Microsoft SAML in IguanaX, please follow the steps below.
Note: To configure SAML settings in Azure, you must have appropriate user-level permissions within your organization's Azure Active Directory (AAD), typically an administrator role.
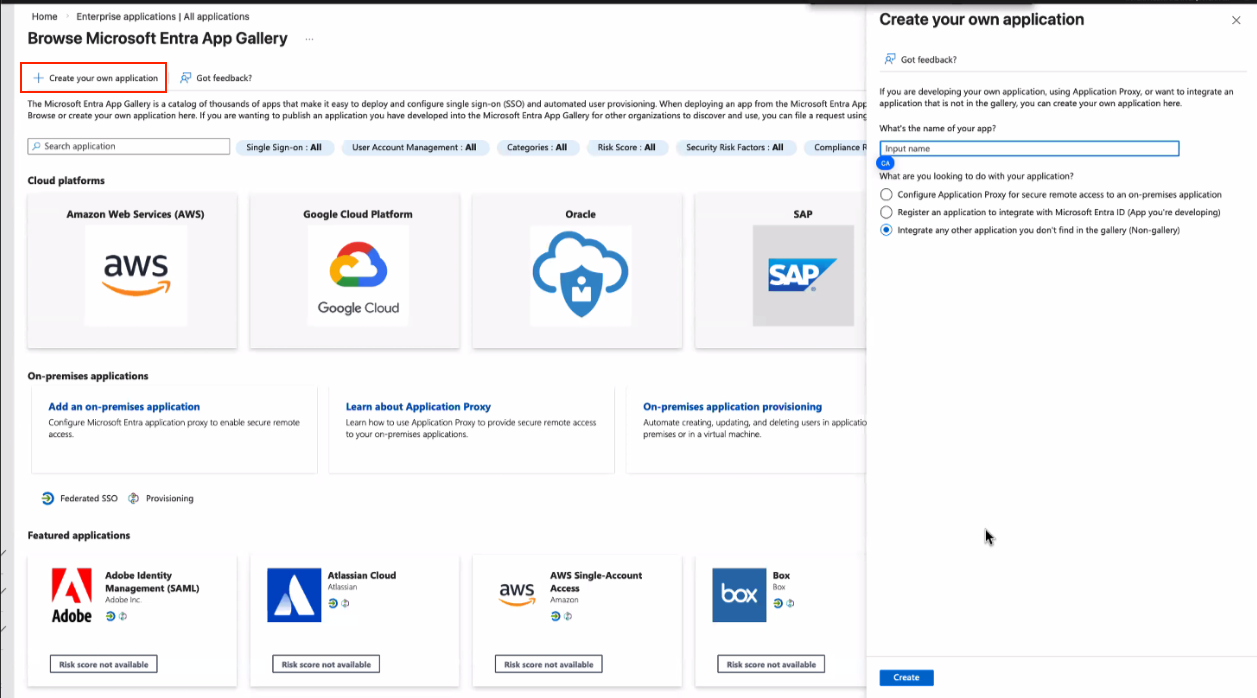
STEP 1. Register an enterprise application on Microsoft
Under the “enterprise applications” section of Microsoft Azure, select create your own application. When creating the application, select “(Non-gallery)”.
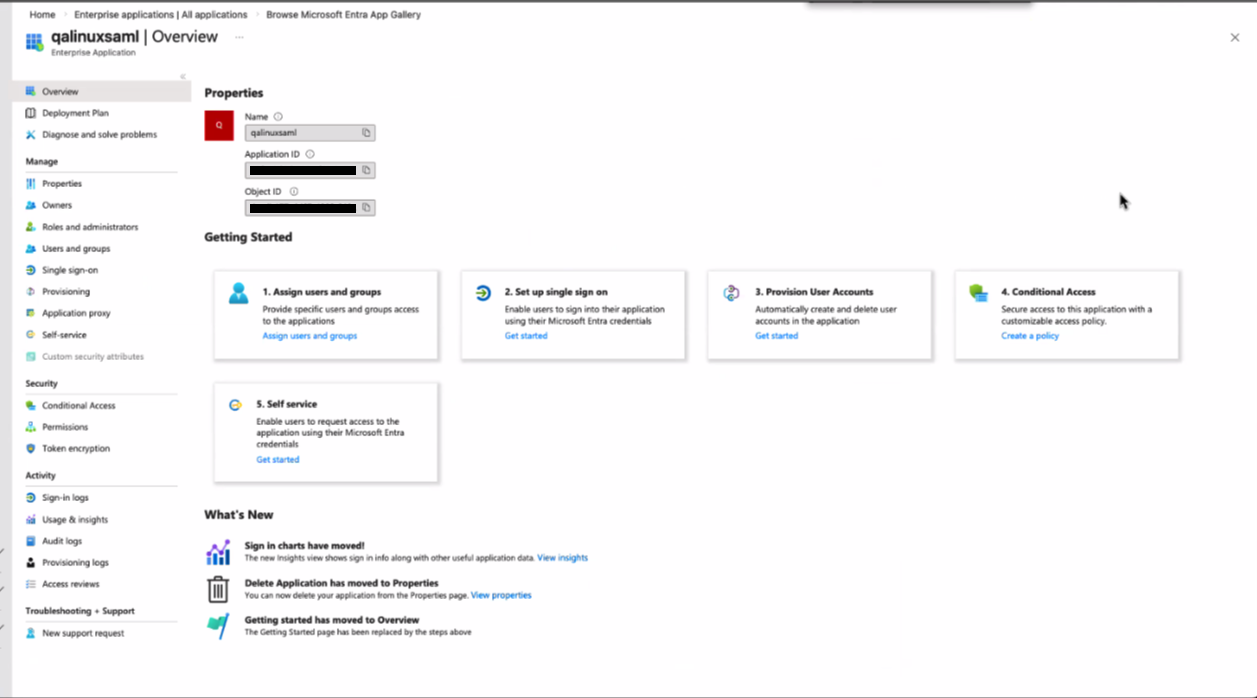
Once registration is complete, the app's dashboard will be visible:
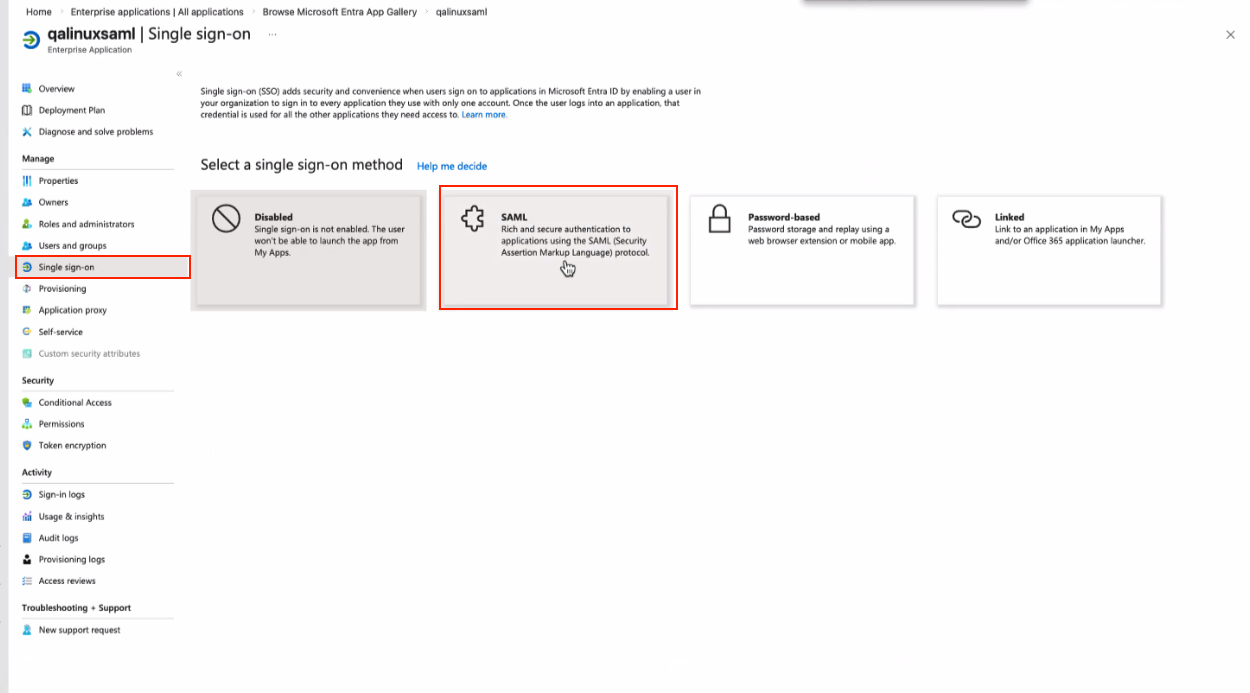
STEP 2. Configure the app's single sign-on method
In the side panel, select “single sign-on”, and select SAML:
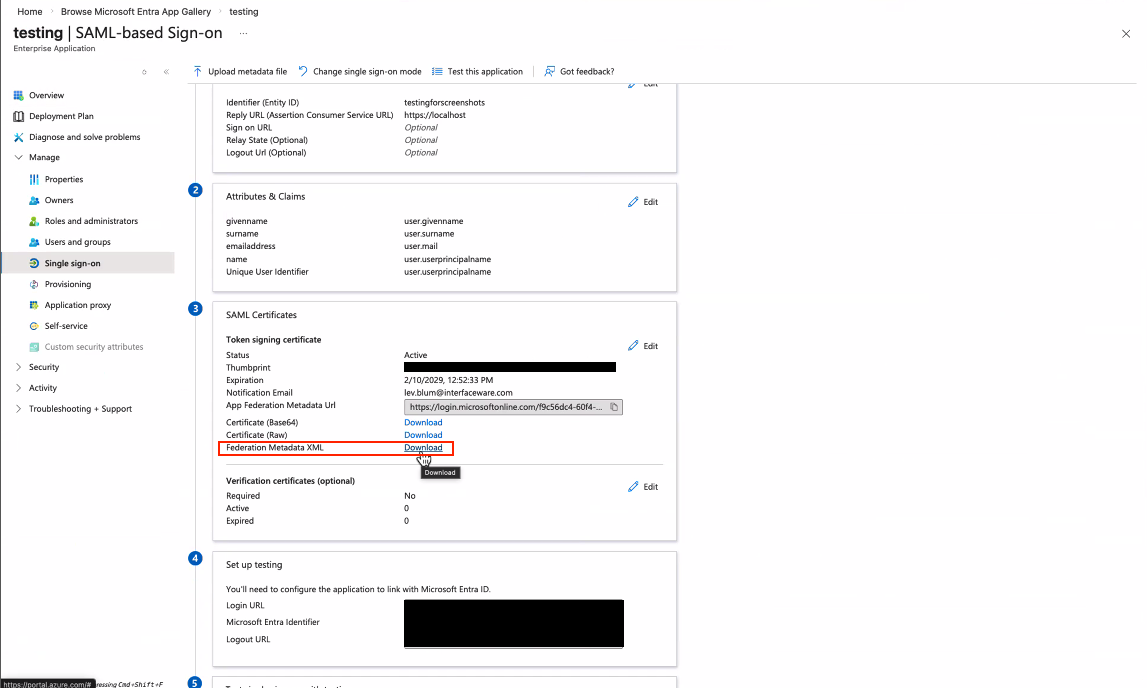
In the following window, configure the Entity ID and Reply URL under in section 1. Chose a unique name for the Entity ID. For the Reply URL, use the DNS name of the IguanaX server, and add /saml/verify to the endpoint.
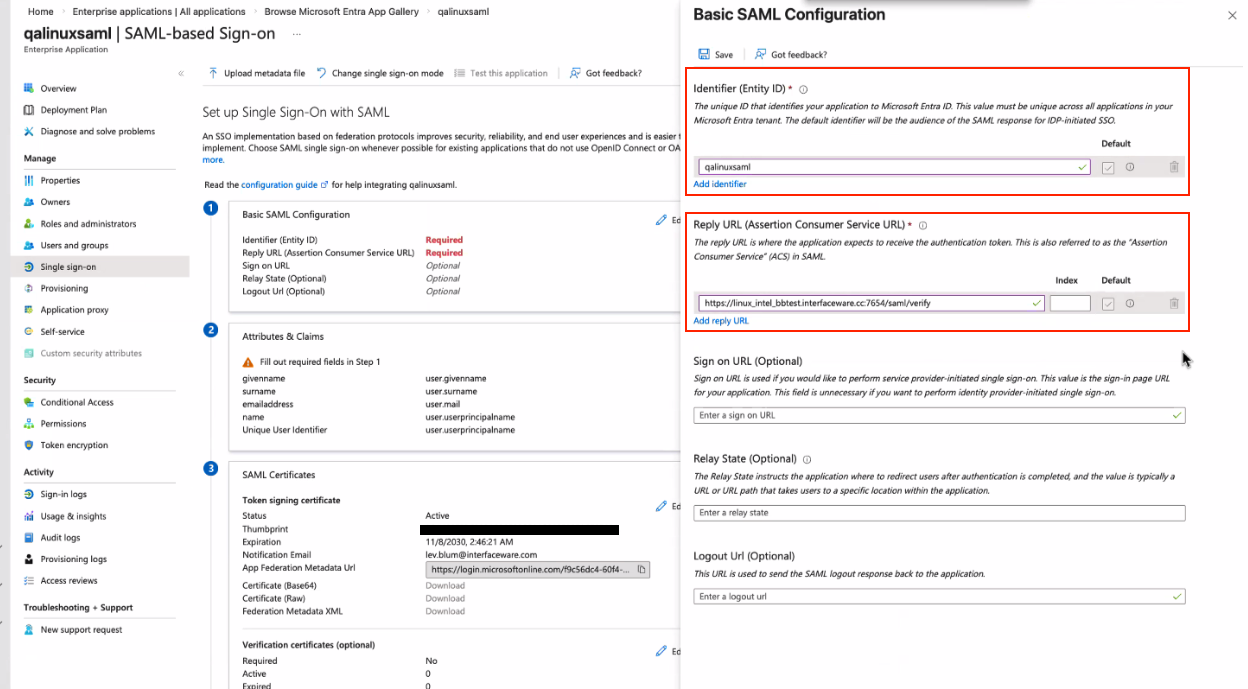
In section 3, select the download button for “Federation Metadata XML”. This file will be used later during the IguanaX configuration:
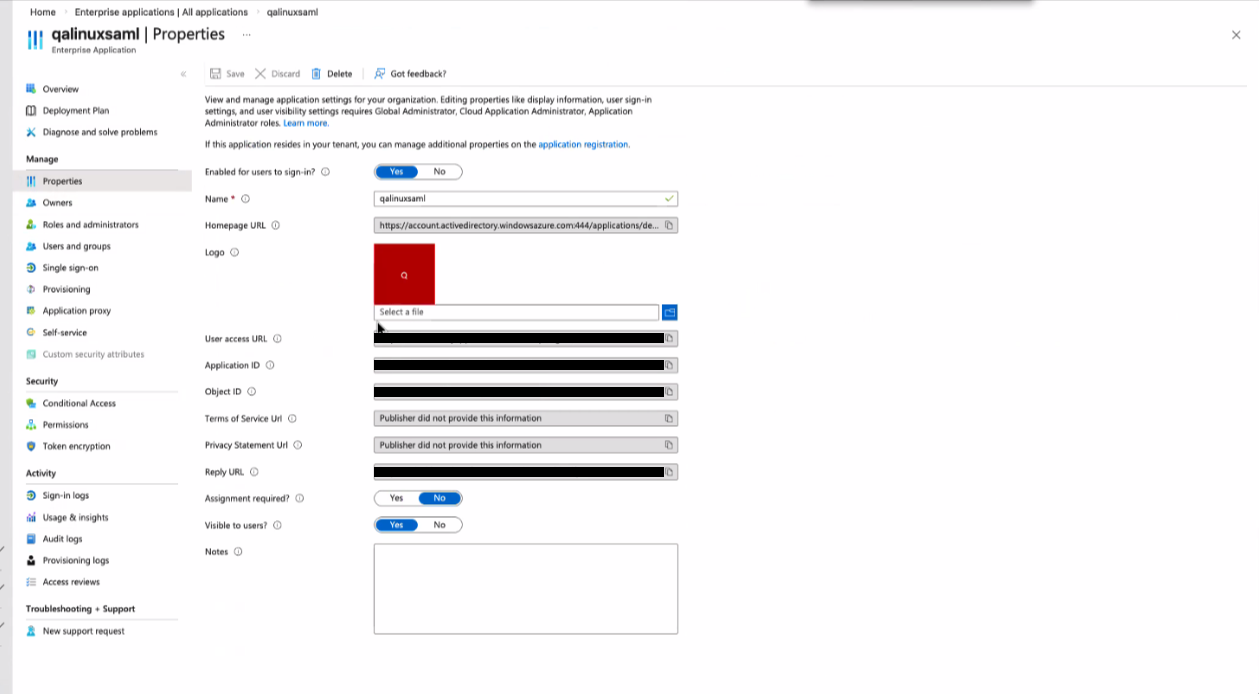
STEP 3. Configure app's properties
In the side panel, select “Properties”. Configure the properties to match the screenshot below:
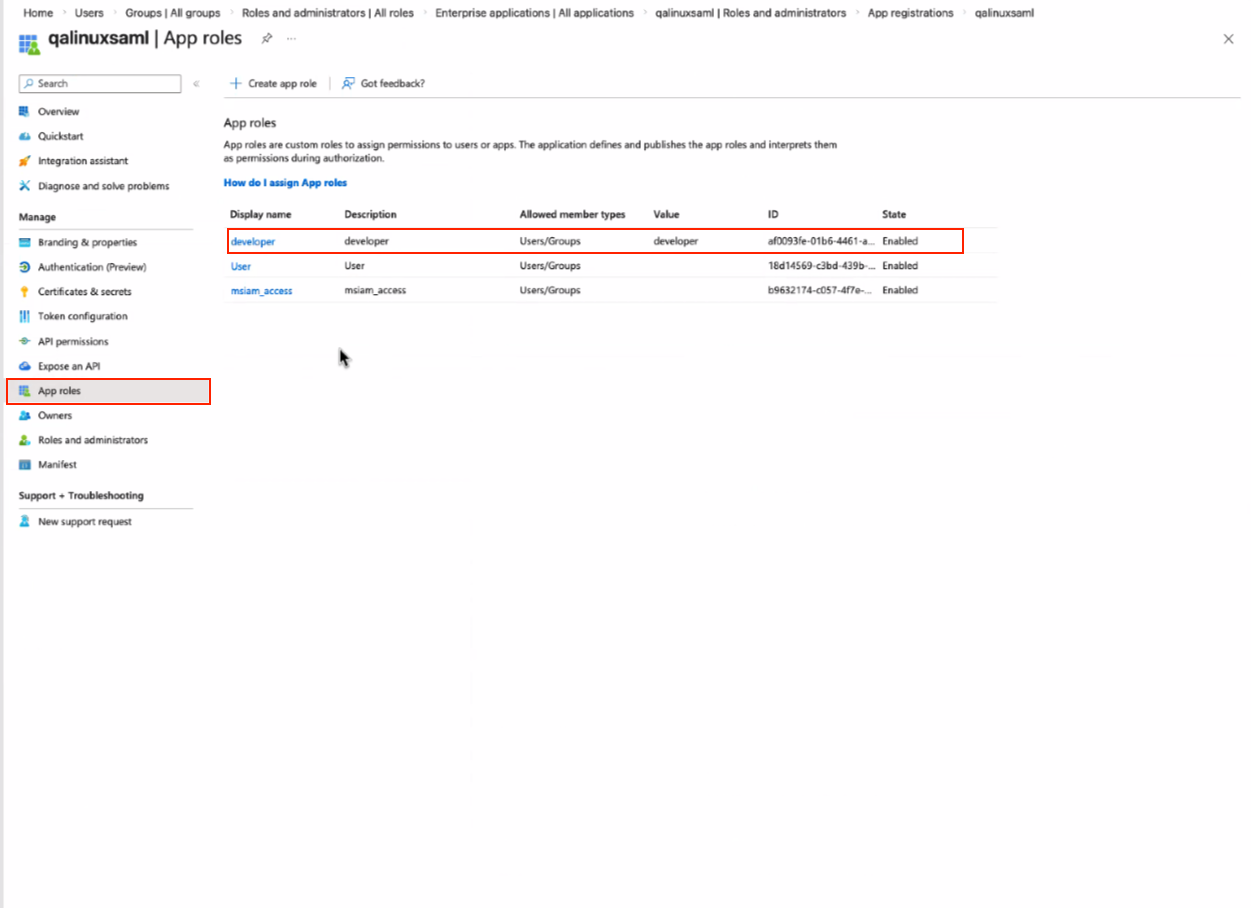
STEP 4. Configuring roles in the app
To have IguanaX roles apply to users that sign in via SAML, there must be a matching role in the app. In this example, the role “developer” is created, which matches the “developer” role name in IguanaX:
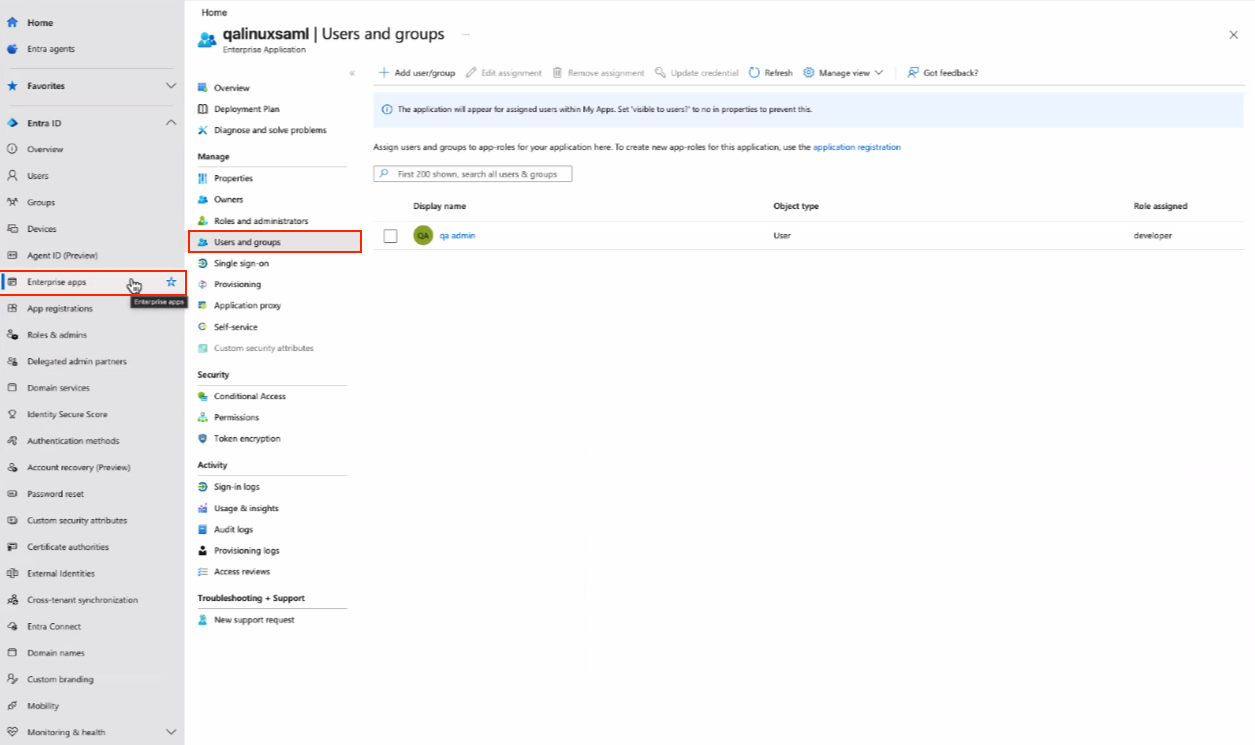
Under Enterprise apps → Users and groups assign users/groups to roles created in the previous step:
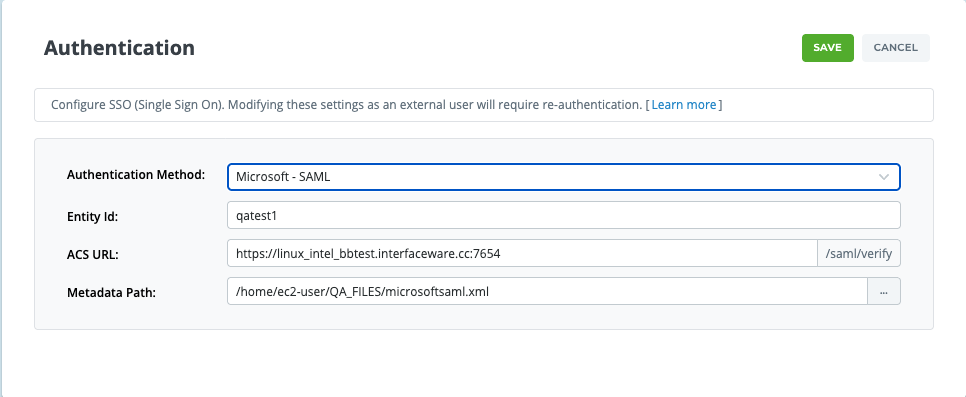
STEP 5. Configure authentication settings in IguanaX
In IguanaX under Settings → Authentication configure the authentication details for the Microsoft SAML application. In the ACS URL section, simply include the DNS of the IguanaX instance (do not include /saml/verify). The Metadata path should point to the metadata file downloaded in step 2.
STEP 6. Test the integration
Now we can verify our SAML functionality!
Log out of IguanaX. On the login page, you should now see “ Sign in with Microsoft” as an authentication option.
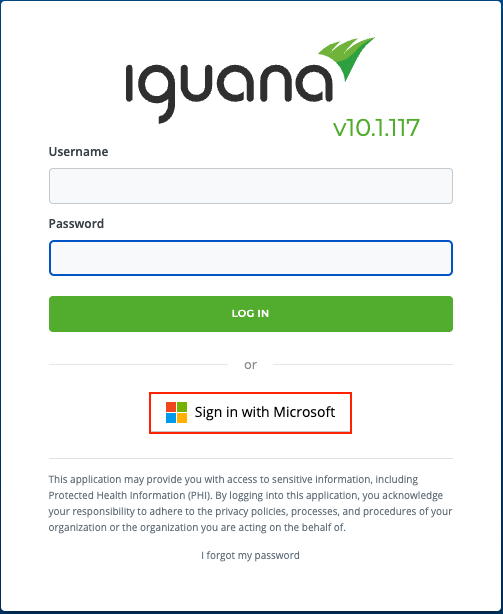
Click it and confirm that you can successfully sign in using your credentials.
Setup is complete! IguanaX is now integrated with Microsoft SAML.